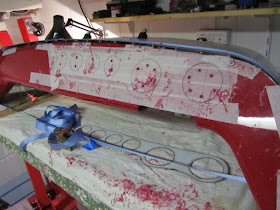
On with parts that can only go in one place; Dashboard fitting, this will also further define how much room I have to play with inside the scuttle area.
I started with the middle bolt hole, working out its location with measuring and dead rekoning, then the same with the end bolts at either side. My thinking was once these 3 are in place the scuttle can come off and its shape cannot change while I 'find' the other hole locations:
On the bench, the ratchet strap is to make doubly sure the panel stays the correct width.
I drilled pilot holes from behind through the rivnuts then opened up to 6mm for the bolts. There is a margin for error i.e. the bolt heads will cover minor adjustments in the holes. I only had one of the nine bolts cause a problem - the top left hand corner hole was waaay off and shows a little from under the bolt head:
I drilled pilot holes from behind through the rivnuts then opened up to 6mm for the bolts. There is a margin for error i.e. the bolt heads will cover minor adjustments in the holes. I only had one of the nine bolts cause a problem - the top left hand corner hole was waaay off and shows a little from under the bolt head:
While the scuttle is off I might as well drill & fix the instruments, I used the stainless surround as a template, with speedo & revs central over the steering column and using the bottom edge of the dash as a datum/straight line for lining up everything else:
No picture of the intermediate stage; lots of dremel work with the router bit & drum sander attachment, subsequently filling the workbench & much of the garage with red dust (again). The drum sander is perfect for taking the GRP back until the gauges fit.
One of the most fiddly steps was removing the protective plastic from the stainless surround, white spirit helps get any glue residue off then wax polish to remove most of the fingerprints. Its not perfect, but looks pretty good :). I've gone for Smiths flight gauges, the standard GBS option, which has warning lights built into the rev counter meaning a clean, minimalist dashboard:
Ready for dismantling & the return edge on the scuttle covering with vinyl & edging, then its back to fitting all the equipment inside!


