Monday 29 May 2017

Birkin, Blakeney and Muckleburgh Tanks

Bank Holiday and I'm at a loose end on my own at home, so a little impromtu road trip to get me out of the house.

The destination has been in mind for a while; the Legend of Sir Henry 'Tim' Birkin. First time I heard of him was a short film staring Rowan Atkinson in the lead role - True Stories - Full Throttle. One of the Bently Boys for a while, had a thing about Norfolk and is burried in Blakeney.

Enough of an excuse for a trip.
The plan - find Sir Henry Birkin's grave, then head back around the coast road. SatNav as usual set to discourage motorways and prefer A and B roads.

Good run up, some fantastic country to look at and some winding roads through Cambridgshire. Through Mildenhall and past the RAF station - perhaps a location in The Fourth Protocol?, Swaffham - Wilt & the Swaffham Strangler?

I think I've watched too many movies!

Blakeney

My preparation included identifying St Nicholas as the correct church and plugged in as a SatNav destination, however once there I hadn't really thought of how to find the right grave.

Started wandering through the graveyard, noticed the curious double tower, and then cheated - looked up a picture online of at least the style of the grave marker - and there it was almost infront of me with an old Photo of presumably Birkin, his Bently and a few small Bently toys. 

Reads
In Loving Memory of
Henry Ralph Stanley Birkin
Tim
3rd Baronet
Who Died June 22nd 1933 Aged 36
A Racing Motorist of International Fame

Sobering - he frittered his own fortune and a proportion of his sponsor's on racing Bentleys. His end, blood poisoning caused by touching a hot exhaust while reaching for a post race cigarette. Silly sod.
Spent a while in the church - original intention being to check out the architecture a little - excellent wooden ceiling and block-work floor. Ended up spending some time to remember family lost in the last 7 months. I'm not particularly religious anymore but if nothing else churches are peaceful places for collecting thoughts.


Salthouse

Time to freshen up! 10 minutes along the coast road, spur of the moment decision to head along the beach road and endulge my other passion - the sea. A little foggy/sea mist, but great wide open views.

The view back to Salthouse, a little chilly and stoney though so decided to drive on before lunch.

Muckleburgh Collection

This is decidedly nothing to do with cars!

Now headed home really, but suddenly, signs to a Tank museum!  Awesome, should be good for a wander and lunch. Half a dozen rooms filled with heavy armour, guns, tanks, uniforms, models etc.

Cheiftain, used to have a Tamiya model kit of one of these, 17th birthday present, fully motorised.  Dad enhanced it with gun elevation and turret motors/gearboxes, including home made slip ring for turret power and perspex control panel attached to the side of the kit control box. We couldn't afford radio control though - so it had 20 or so wires trailing from it to operate everything.

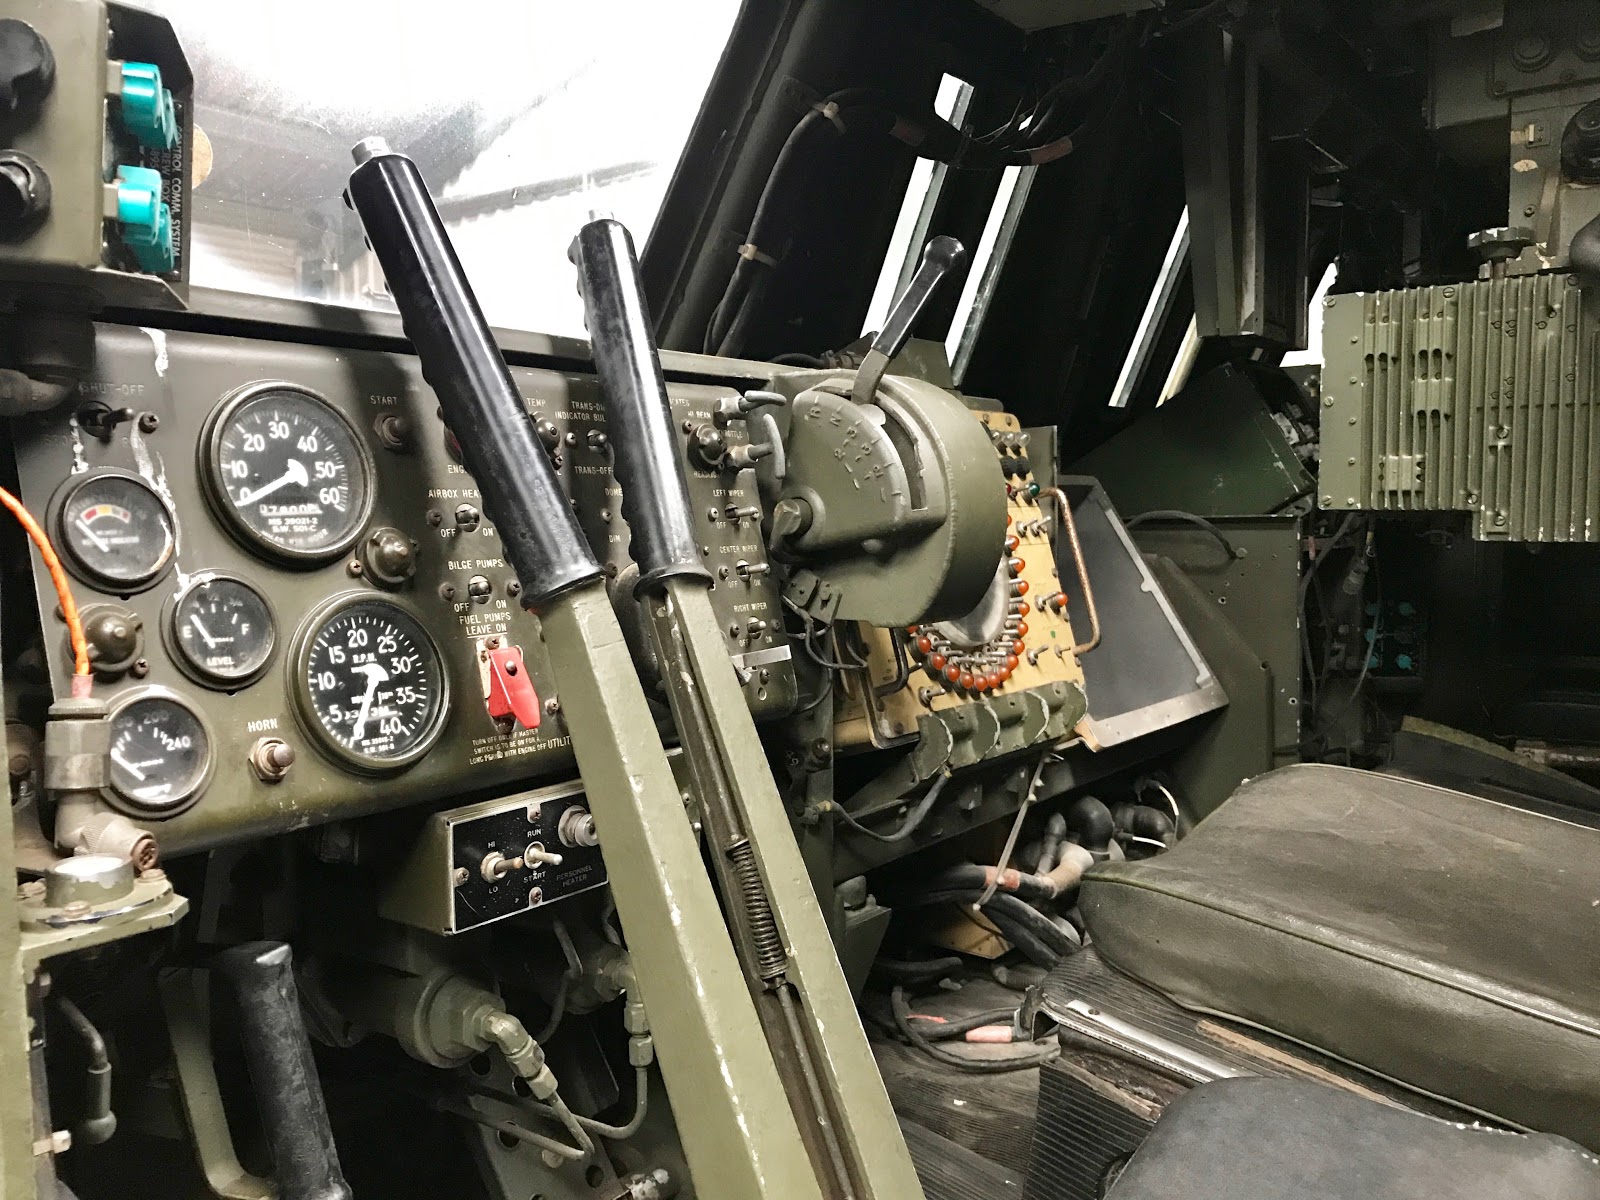
Checking out some alternative controls in some sort of tracked missile launcher.

Russian T34 perhaps?


Comet, didn't know this name before - but you can tell it was British.

Not over keen on it's driver facilities, most of the tanks have hatches open which is great for some pictures and insight into driving conditions.

Outside a poor Harrier jump jet, but you can climb up and get close, got to love the straightforward single engine design and ducted exhaust to 4x fuselage vents and wingtip/tail tip outlets.

Only potential car application - a genuine NACA duct leading into the empty engine bay.

The cockpit condition is criminal really, full of water damage and mildew, the canopy is not correctly closed or seals gone, there is standing water in the footwells. All the controls are still in there slowly rotting.


Home

The rest of the day making my way home, around the coast road to Weston Super Mare, Lowestoft and through Essex, a bit of fun here and there on empty A roads, and a little discretion applied when the local boy racers decided to try and compete. Its not about the bottom line speed - its about the corners and handling!

Long day, left 7.30am home around 7pm but great to spend some time speeding through the elements in my Zero.

Wednesday 24 May 2017

Sheppey and Shellness

Weather was great all day, so as soon as I finished work took the car for a spin to the Isle of Sheppey, an hour or so each way, scenic route as far east on the Island as I can get to the end of Shellness road.

Around 8.30pm and a fantastic sunset, this looking west back across the island with the car snuggled just under the sea defence embankment.

...and looking east/south east over Shellness beach along the Thames estuary


Way off in the far distance the smudge on the horizon is the Maunsell Forts. I think it must be Red Sands Ford centre frame and Shivering sands to the right, more detail visible with the naked eye than my camera. They look like some sort of War of the Worlds tripods frozen in time.

Huge skies, and a decent drive, love it.

Friday 19 May 2017

New Tyres - Hankook Ventus V12 evo2(K120)s

18.8k miles, 4 years in and the MOT flagged the rear tyres were on their last legs, still legal, but reported as an advisory. The offside rear had plenty of tread but wearing through the inside edge.

So time for a change - I've gone for Hankook Ventus V12 evo2(K120)s, fitted care of Staplehurst Tyres.

Chosen through a combination of reviews, price and wet performance. I need a general purpose tyre, nice as slicks/semi slicks look, I'm road use rather than track. The spare not being replaced - its not directional which makes more sense for a spare, I can use it on either side of the car.

Hankook's Symmetrical and Directional tread - I think a good compromise between practicality and looks. In theory if the inside blocks start to wear I could swap tyres (not wheels) side to side and even the wear pattern.

Need a few miles on them to run in and we shall see!

+ while watching chatting to the tyre fitters, an idea - I need some distinctive jacking point indications on the bottom of the car, either stickers or simple painted circles.

Tuesday 9 May 2017

Wheel bearings

The drivers side rear wheel had a bit of play, detected at MOT. So before replacing the tyres I'm replacing the bearings. On the original build I had replaced oil seals but for some reason left the bearings as they were - just delaying the inevitable!

Procedure is as described in my old Sierra manual plus a useful page compiled by my car club: RhoCar Changing a wheel bearing assembly (Sierra).

The rear assemblies are relatively straightforward - no special tools required - but an oil seal puller is useful.

I have a 1m breaker bar and hub nut socket, used on the original build, which loosened the hub nuts with relative ease - pressure applied with the car on the ground, wheels on, in gear and handbrake applied. Then jack up, wheels off, brake calliper off, disc off then finally a puller to pull the hub plate off the drive shaft.

Offside

Now that is a spanner!

Just nuts and bolts - however the 4x bolts holding on the bearing carrier went back on with nuts on the outside - much more accessible on the completed car.

Drive shaft bearing surfaces a little discoloured, not blue - but straw coloured so ~300ºC at some point in its life. Feels smooth to the touch, a little muck on the rear edge where the oil seal rides - but looks serviceable to me - no change required here other than a wipe down.

Part way through the job, old bearings and seals out. Tools: oil seal puller works well to hook underneath without damaging the carriers, steel drift and hammer to knock out the old bearing races and install the new, wooden packing and g-clamp to hold things steady.

Drivers side carrier with seals and bearings removed - looks and feels ok to me.

Re install is the opposite of dismantling, straightforward - precise application of pressure taking great care not to damage any of the new components and keep everything clean of dust or other contaminants (other than copious grease).

Notes:
  • Hub nuts are handed, both loosen towards the back of the car, tighten towards the front. Interesting reason why to do with precession which I found out on the original build.
  • Keeping the bearings and the seals in the freezer beforehand makes them possible to fit.
  • Need to keep the bearing inners with their own races.
  • Pre fill the back of the oil seals with grease before chilling so they can come out of the freezer and straight into the carriers before they warm up.
  • The vice was useful for balanced pressure on the oil seals to get them started back in. Stacked with the old seals to avoid any damage on the new - this is the trickiest part of the job IMHO.
  • The old bearing runs and oil seals are useful as drifts to help install the new ones without damage.
  • The grease is messy - everything gets messy - gloves useful, if only to have one clean hand to get back in the house!
  • Nylocs and hub nuts are one use only - so all replaced during the procedure

Drivers side complete, test run not showing any issues, passenger side is next!

Update - passenger side complete 13/5/17

Nearside

Disassembly,

Oil seal puller,

Bearings out - again this carrier looks clean inside,

Re-assmbly - bolts on the outside now for accessibility reasons, left handed hub-nut this side.

If I got it right, that should be it for the life of the car.

Wednesday 3 May 2017

MOT Pass

Computer says yes!

One more year on the road, MOT test professionally worked through by Tom at http://www.staplehursttyres.co.uk. I am all legal for another 12 months open top motoring.

Good friendly and flexible team at the testing station - thank you!

Its reasonably stressful having someone else checking my Zero, I definitely want a first class MOT test - I'm trusting my life to the car - but even so, I put every nut and bolt into this machine, theres a lot of effort and emotional investment.

Emissions adjustment

I think I finally have the emissions worked out! 

I spent 20-30 minutes adjusting the map before the test, Staplehurst tyres let me use their emissions equipment to fine adjust things. The map wasn't far off, just needed a tweak to 14.7 AFR in some key areas (calibrated), and adjust the underlying injection map to ensure the Lambda wasn't pegging at its 20% adjustment limits - i.e. give it enough leeway to do its job actively managing the fuelling.

The new wide-band lambda gauge helped massively, now I have the equipment on the car to actually accurately measure and adjust the fuelling.

Once we had all stable green on the test machine - Tom setup the MOT test proper.

Learnings:
  1. Use an accelerator holding device for the fast idle test for consistency 
  2. Don't adjust or leave things too long on slow idle since everything (CAT) seemed to cool down and readings wander.
  3. Adjust one thing and wait - give it at least 5-10 seconds to settle before making the next change- force myself into a think-adjust-wait-think MO and avoid rushing things.
  4. Don't be afraid of re-loading the before adjustment map - start again from a known point if things are not going in the right direction.

MOT Test

The test itself was no issues,

I already had emissions dialed-in from the adjustment session, so let them settle again and watch the count down timer on the test machine until it turns into a green tick,

..nothing found on the suspension shake/rattle tests, steering or fuel system etc. I'm much more relaxed about the physical part of the test - if there is a problem I know how to fix it - or I know I can find out how to fix it with tools in the garage.

Headlights within limits but a little high on the nearside.

If only I had space for a lift like this - it would make life so much easier for maintenance...


The to do list now has:

1. New tyres required, rear nearside is especially low on the inside edge. This was due anyway but I thought I would get the MOT out of the way before investing in them, i.e. didn't know if I was looking at a re-map first!

2. Offside rear bearing has a small amount of movement when no load on it, sounds and runs fine, but probably an indicator of a job to come. If I'm replacing the bearing then I may look at some camber shims for the rear at the same time,  no particular rush on this though.

3. Headlight alignment - again I'm within limits just needs a little adjustment.

4. Reverse engagement sticky when on the rollers - need to keep an eye on it

Otherwise we should be good!