Sunday 26 January 2014

Tonneau - nearside lid

I spent some time mulling over the options for the top tonnau 'lid' sections - decided on two separate pieces to give most options when driving the car i.e.
  - Sides on only when there is a passenger
  - Sides + nearside lid when driver only
  - Sides + both sides lid to keep weather out when parked outside

Tried the template approach again and a simple back of envelope plan:
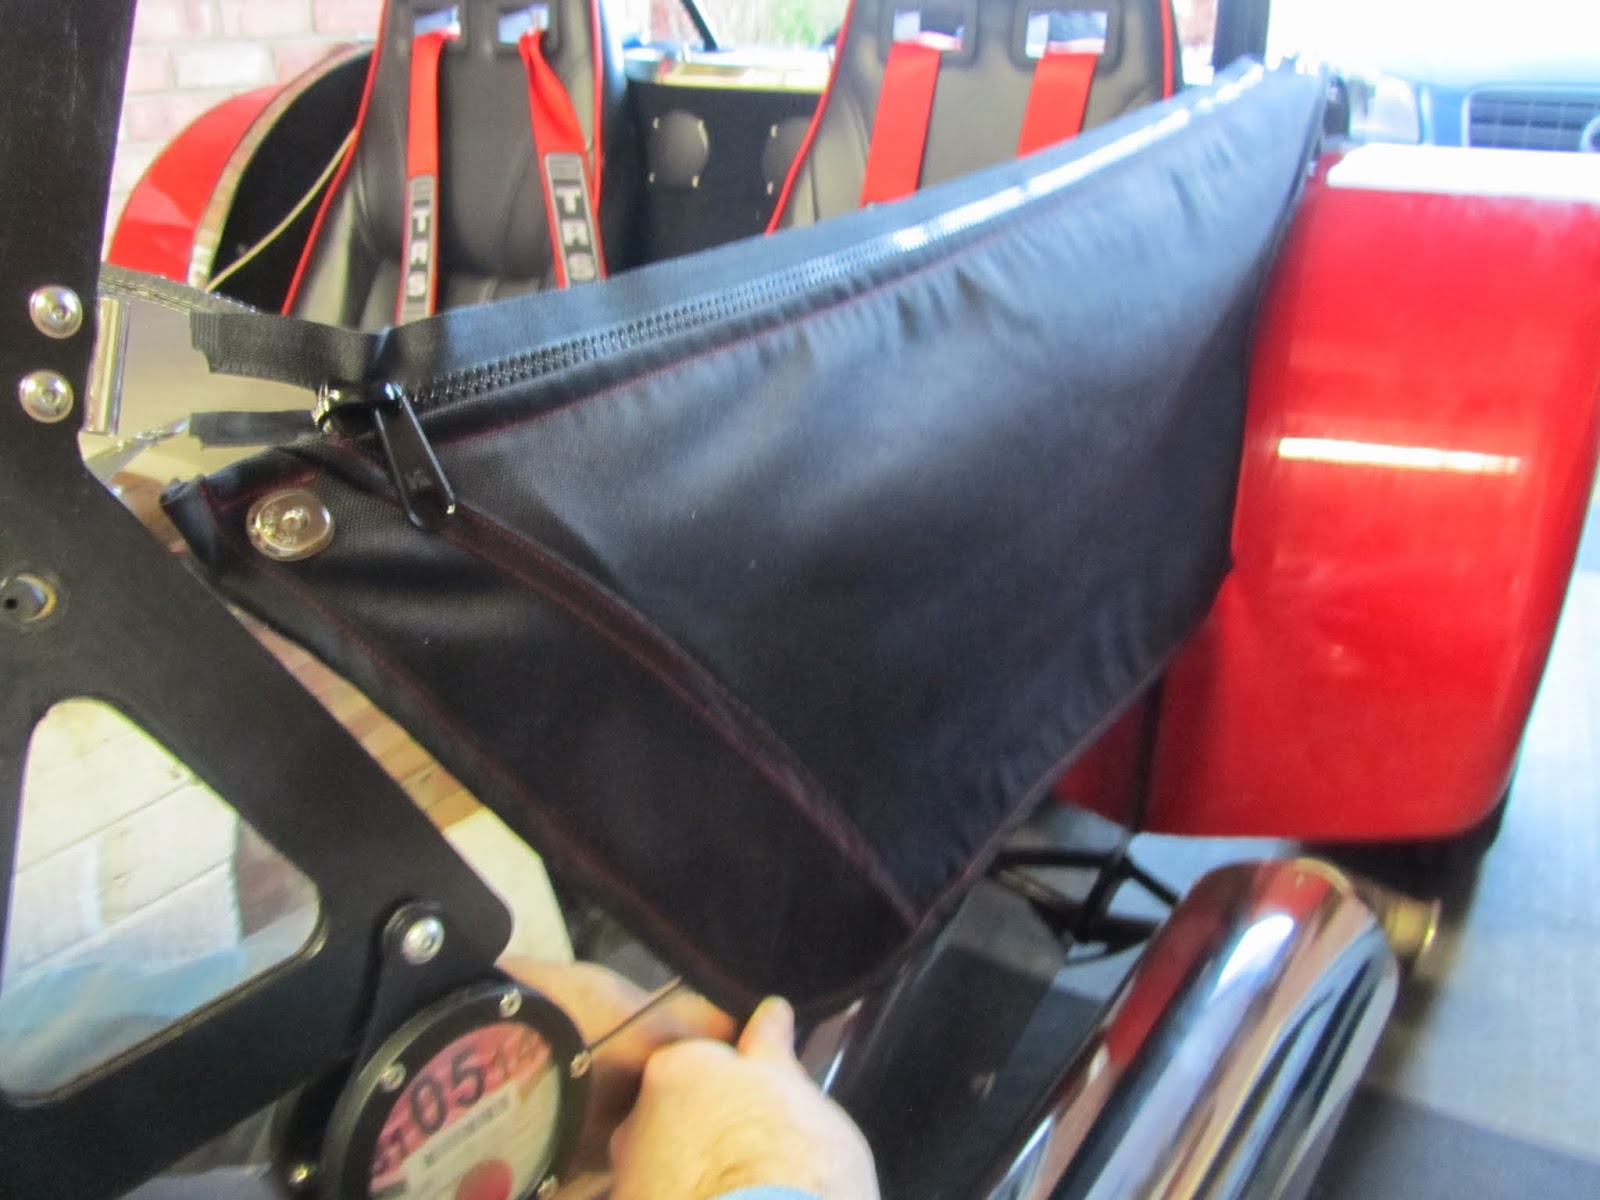
Flaps over the zips to keep out the worst of the weather, and initially I was going to have the offside much wider - to cover the tunnel and enclose the driving position as much as possible.

A test run (with string between the lift-the-dot studs) identified the best solution - the lid needs to allow a little more width at the back for shoulder space so runs from the rightmost front stud to the rear left one:

 Marking up the template:

And - only 5 hours later! - the final cover.

It was partly template driven, but mostly fitted to the car with frequent fitting tests between steps. Cardboard template made for the seat pouch which was simple enough to make in itself but a real s*d to sew into the main flat cover - hopefully the drivers side one will be easier now I have had a little practice:

Test fit on the car, but not tensioned up yet. Its never going to be a drum-tight tonneau, more a lightweight cover to keep the worst of the weather off & compact enough to all roll up into a corner of the boot. You can see the offset centre line - to give more shoulder room to the driver:


Getting there - its also coming out neat enough. The red contrasting stitching is a double edged sword - on one hand all the stitching is visible & in your face if there is a mistake, on the other hand I don't even have to try to hide the stitching on the bias tape edgings or zips because its a feature.

Might need a flexible pole across the cab for overnight stops to avoid a puddle in the middle.

Friday 24 January 2014

Front mud-guards

Borrowed an idea from Bill Rees' Blog, for front mud guards / mud flaps. His description of arriving back with grit & road chippings in your seat/cab area struck a chord.

Stock universal flat guards from ebay, modified slightly - easily cut with a wood saw - and bolted in place:

Taking care to protect the tyre when drilling the holes:

The Tonneau is still in progress - I just get distracted easily & this job didn't need holes drilled in the bodywork,  quick win.

Sunday 19 January 2014

Tonneau - studs & one side on

Installing the studs; I have various kinds, where I can get to the back of them its a simple threaded stud and nyloc nut. Where I can't I'm either lining up with a chasis tube and tapping an M5 hole or using rivet on studs.

Windscreen off for access to the scuttle & a row of 6 studs laid out low tech string to get them in a line:

Couple more between the seats, these two are installed in tapped holes in  the chassis tube beneath:

Fitting a side/door panel

Turned out I made the side panels too short - the original size would have put the fixing stud on the wrong side of the dash panel and visible from inside the car. Time spent today re-working the offside one to extend the front edge 2" - it fits fine now; just waiting on a couple more lift the dot bases to hold the bottom edge in place:

Getting there slowly.

Saturday 18 January 2014

Tonneau - side doors

I'm working upwards now - if the roof doesn't happen I still need a way to enclose the car to stop it turning into a bathtub and filling with water. I'm going to keep things simple and build a tonneau - a four part design, side 'doors' and then covers over the top connected with zips.

Inspiration - woven shower curtain fabric makes a much better pattern material & only a fiver for 2m square. The datum is a string running from the windscreen bracket back around the roll bar sides:
Hindsight - The leading edge might do with some more fabric here and run right up to the windscreen bracket, especially if the mounting clips will sit behind the dash face.

Offside door complete - I have some heavy duty zips along the top edge for attaching other parts and simple bias tape edging to keep everything looking tidy. I'm intending to fit the doors completely first then measure for the rest of the cover - that should compensate for any errors/inaccuracy in making up each part.

Plenty of googling for videos on sewing & especially bias tape, its good stuff though - means I only need a hem along the straight zip edge - and gives a good finish even on curves:

On the inside no lining, but some reenforcement on the corners where it will be attached to the car:

Both sides complete & pretty much the same shape & stitching (on the outside) is presentable. Working with fabric is difficult 'everything' moves all the time but I think its turning out ok:


Tomorrow I intend having a go at fitting them - the plan is lift-the-dot fasteners so there is no way they can get blown off; the trick will be installing the fasteners to miss chassis tubes & get the right tension on the fabric panels.