Showing posts with label steering. Show all posts

Saturday, 15 July 2017

Steering wheel bolt change

Can't really call this maintenance, there was nothing wrong with the old steering wheel bolts other than looking shabby.

Replaced them with some new M5 button head stainless ones.

Great improvement over before - the original black bolts had gathered a tinge of orange rust from being in the elements.

Monday, 17 April 2017

Replace steering column bush

I had a little, 2mm, play in the steering wheel, traced to the nylon lower bush.
Didn't feel right, apart from being an MOT issue, so swapped out the whole thing.

The parts are cheap, new on the left, old worn one on the right.

The bush had ridden back up the column. I'd seen plenty of pictures before the build of jubilee clips to back up the standard sliding clip, ignored them and now learned the hard way - its worth adding!

Interesting job replacing the bush and its mounting with the car built - last time I did this there was nothing in the engine bay and the scuttle was not installed. New installation shows the inner bush pushed fully through.

And the steering column moutnings - replaced with new nyloc nuts towards the driver this time - much easier to install & remove when the scuttle is on due to limited room behind to weald a spanner.

I did contemplate upgrading the bushing to a full metal bearing, decided not to because:
1. This arrangement has been fine for 4 years and 18.4k miles
2. Its a relatively straightforward like for like parts swap
3. I need to focus on the MOT and not make maintenance jobs larger than they need to be

Wednesday, 5 August 2015

Wheel alignment

I found a relatively local firm in Canterbury  Treadmark Tyres, various forum reviews seemed positive & they had a great 'turn up and we can help' attitude over the phone.

They use  an automated laser alignment/measuring system from John Bean - large 'T' style 'eye' which locates and measures targets on each wheel. A fay cry from the manual process I was using previously & a lot less hassle, the whole exercise came to under £40 even with camber adjustment.


Before and after settings pictured.
Only the front is adjustable, rear end fixed by the suspension arm geometry.

Not a million miles out beforehand but she did run a little lighter on the steering home.

Do need to check the diagram for rear right, i.e. the wheel image shows +ve camber, while the measured number is showing -ve camber. The back isn't adjustable anyway so not too much of a concern - I suspect they didn't even bother measuring it due to lack of adjustment.

Saturday, 6 June 2015

New 2.4 Quick Steering Rack


Steering rack upgrade; Intended to avoid me getting 'behind the car' on those fast/speed change corners which tighten mid way. The new rack is a 2.4 replacing the old 2.9.

At the same time I'm upgrading the mounts to billet alloy:


First trick, I didn't want to take the radiator out and drain/refill the cooling system unless I had to. The rack cannot be extracted or installed from the side - it doesn't fit through the panel openings - so instead a convoluted route, threaded down the side of the engine and then up and out at the front, new one went back in the same way:

New (foreground) and old, identical external appearance:

It could have been a simple bolt in job, but changing the mounts also meant some adjustment of mounting holes on the nearside chassis bracket - again not easy due to leaving the radiator in place - but the results are tidy:

The bonus - steering wheel now straight, I actually checked it this time while setting up the wheel alignment:

Excuse for a test run this evening around 70 miles towards Faversham, via some great country lanes near Norton and back along the A2; the 2.4 rack does make manoeuvring, especially reversing, a little heaver. At medium speed not a huge difference, but when accelerating or driving at speed the slightest nudge on the wheel has a dramatic impact - like it!

Saturday, 1 June 2013

Mountney Steering Wheel

First of the upgrades - off with the stock Sierra wheel and I'm installing a 12" Mountney in its place. This is the same model wheel I had on my old Spitfire, worked well enough then so sticking with it.

I kept the horn slip ring from the old wheel however its not actually wired in currently, just will save me taking the wheel hub off again if I decide to use the horn centre push:

Straightforward unbolt & torque back up again ensuring the indicator cancelling cam is in the right place.
I upgraded the supplied wheel to boss bolts with black button head allen bolts with shake proof nylocs on the reverse - just to match the style elsewhere on the car & nylocs 

Much better!
I just need to pick up a GBS centre badge at some point and we'll be good.

Friday, 29 March 2013

Steering rack adjustment

IVA picked up on the steering rack boots; the nearside boot was resting on the lower wishbone mount & offside was rubbing on the side panel when on full lock.

The only way I could get the rack centrally through the panel cutouts & missing the wishbone mounts was to raise it both sides; I made a couple of shims from off-cut aluminium sheet to lift the offside end 3mm:

I also filed back the corner of the chassis bracket to allow a few more mm height, making sure the rack lip still overlapped the chassis bracket to give left/right stability (Filed area was painted over after this picture):
Looking at this picture, I might replace the bolts with slightly longer ones - I'm right on the limit now

On the nearside I moved the thick spacer plate above the chassis mount - again to give a little more clearance over the wishbone mounts. I think I'm ok now - pictures of offside & nearside when on full lock - the boots don't touch anything now across the full steering travel:

The gaiters actually sit right above the wishbone 'U' brackets, which this picture doesn't show clearly - i.e. although they are miles above the wishbone end itself its that vertical edge on the chassis bracket they are very close to.

Sunday, 17 March 2013

Aux panel final fit

The aux panel should have just bolted into place - it needed a little adjustment due to the tilted heater position & then s*ds law a couple of the rivnuts I installed were not seated correctly & rotated in their holes as I tightened the bolts. I had fitted them through the carpet, tunnel panel and into the chassis tube which was too much depth.  I re-fitted the rivnuts by removing the carpet first then lined up the bolt holes using my centre punch as a make shift marlin spike:

The dash area is almost done; I need to make a decision as to whether I am covering the passenger side leg space & then the dash can go back in permanently.

While I was working on this I noticed the steering column was wobbling...   the bottom bush had slipped out of its housing & with the pedal box now complete it was very difficult to get in there to push it back in place. Pedal box cover came off, brake pushrod out & then there was just enough room to get the bush back in place & its lock washer pushed tight up behind it.

The steering is all back rock solid & smooth again now.

Sunday, 17 February 2013

Odds & S*ds - Tracking & Wings

Finishing various jobs today;

IVA Looming

I got an email from IVA Gillingham, asking me to get in touch and make an appointment for the test! Yikes - need to get a move on


First up was to turn the car around. My drive is on a slight incline so my thinking was if I have the front of the car just out of the garage it will be level enough to setup the tracking and give me more space either side to 'sight' the cycle wing positions.

This was the first time I manoeuvred the car out of the garage under her own power - so gearbox, clutch & brakes all put through their paces - in a very minor way.

Reversing light working, brake lights working

Slight weep from the now filled brake system - cured with a quarter turn on the pipe union.

Brake push rod

When I got the kit the very first job I did was the brake cylinder & pushrod - I cut the original rod far too short but now I have the brakes filled I created a pushrod of the correct length:


Adjusted the steel 'stop' in the pedal box which is adjusted to prevent the pedal moving too far back. The brake pedal is firm now - a good sign

Pinch Bolt backup

On to the final part of the pinch bolt modifications; I drilled and installed a couple of roll pins (just to the left of the pinch bolt/IVA cover in this picture). These 20mm 3mm diameter roll pins run through the casting and into the dummy upright - even if the bolt were to loosen they might save a catastrophic failure and give a little warning that something was wrong before the upright parted company with the wishbone:

Tracking

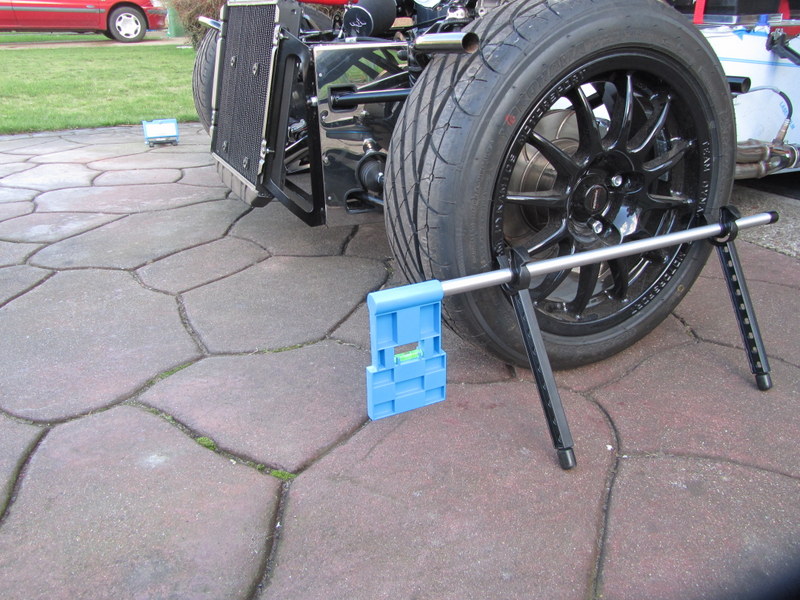
My first try at setting up the geometry; just basic front tracking for now. I obtained a TrackACE alignment kit and gave it a try. The principle is a laser bouncing from/to a fixed point and comparing the result between the wheels:

I spent some time finalising and torquing up the steering column and rack. Trying to at least start with the wheel close to centred. With hindsight I guess the car sorts the centering out itself when rolling & I'll need to adjust the steering wheel alignment again later.

Nearside first - everything is aligned so the laser travels twice across the car & hits the zero mark:

Then offside:

The result after my first attempt, I started at 2Âș toe in, and adjusted it back to 15' toe in - 2x complete turns on each track rod. I'm not sure yet the ideal position but its reasonably easy to adjust - by rotating the track rod assembly and winding each side in or out:

All booted up - the nuts will have to be covered for IVA due to the sharp/small radius edges:

Cycle wings

And last up while I had the front of the car outside I offered up the cycle wings. They really dont want to sit in any particular position so I'm going to sleep on it before making anything permanent. I think I'm close; sitting quite far back on the wheel (while also ensuring I have the appropriate 30Âș coverage at the front as required by IVA):

Without the nosecone the car looks very retro - like some 20s or 30s roadster with the big radiator up front.

Saturday, 16 February 2013

Front upright pinch bolts upgrade

There was a RHOCar Discussion on the front suspension pinch bolt, some comments about IVA liking to see a locking nut on the bolt & a great picture part way through of the consequences of the pinch bolt  coming loose and releasing the dummy top strut.

After reading it I decided to make some minor changes. The kit as supplied has M12x50mm bolts with lock washers under the heads. These sit completely flush with the back of the Sierra upright when installed.

My plan is to replace them with M12x65 bolts & add a lock nut on the rear side, as well as probably a couple of roll pins installed to positively lock the upright to the inserted dummy strut.

This is the pinch bolt as supplied in the Kit:

My original vs. replacement parts:

..and an example installed on the offside; the bolt still has the lock washer behind the head & torqued up as before, but also a nyloc on the other side. Hopefully this will ensure there is no way it can come loose:

I need to take the wheel off to install the roll pins which will have to wait; I'm using both axle stands on the rear of the car currently.

Friday, 7 September 2012

Alternator & Steering column

Alternator

Alternator mounted, I used a straightedge to line up the front pulley face with the crankshaft pulley - I'll double check when the engine actually turns over that its all aligned. It was easiest to take off the plenum & intake manifold adaptor to get at the alternator bolts:

Belt in place - possibly a little slack for now:
The star on the crank end bolt & the masking tape on the chassis rail were markers to align the engine.

Update - I should have cleaned off a little of the powder coat on the mounting brackets to ensure a good earth for the alternator. Remediated later with another earth line on the intake side of the engine.


Steering column

The steering column came out to drill the engine mounts - so now back in with the correct steering rack bolt which locks the column in place; it can't pull off the rack spline even if the nut came loose. Centred the rack beforehand.

Sunday, 8 July 2012

Steering column - prep for rolling chassis

The steering will all be setup for rolling chassis, but not permanently attached. Steering column is going in next for its final install.

Upper column bush

I have seen a couple of builds with this pushed in from the engine bay side, so double checked with Richard when I was at the Newark show. The inner nylon bush sits inside the rubber grommet from the inside of the car, it effectively locks the rubber grommet into the chassis opening and means it cannot work itself lose during use.

This is how (I believe) the outer bush fits in the grommet:

The grommet goes in the chassis hole first, then the nylon bush is inserted. This is incredibly tight, and notwithstanding I had inserted it before I could not get it to fit. I cleaned out the chassis bracket to remove powder coat and eventually it went together:

Bulkhead cover plate

I modified the cover plate, I think its meant to be attached from the engine side of the bulkhead, but I found it impossible to install the grommet & bush when it was in that position.

I fitted the cover plate from the inside, cutting the top edge off and adjusting the steering column cutout & putting a slight bend in it to ensure clearance from the bush. Bonded and riveted in place, this will all be carpeted when completed.

Brake pedal alignment

The brake pedal was very close to the fluted part of the column when in its forward adjusted position, noted on day one of the build. Advice from Richard was to either pack it out or bend the pedal. Bending the pedal wasn't going to work - I don't have the tools or indestructible bench & vice needed.

I therefore dismantled and re-worked the pedal box. Cut the nylon bush into two parts, and reduced the length of the pivot tube so I could get the pedal as far out of the way as possible while still cleanly operating the master cylinder:

Plenty of clearance now with the upper column in all its adjustment range, and the column 'washer' moved down to stop the inner bush riding out of the outer bush.

I need to check there is room for the accelerator though. Checked - plenty of room, but the accelerator mounting bolt goes through the pedal box panel - so will have to wait & the end of that peddle bolt might need to be shortened too.


What I thought might have been a simple job turned out to take a reasonably long time getting everything where it needed to be, especially the upper column bush!

Friday, 6 July 2012

Steering rack

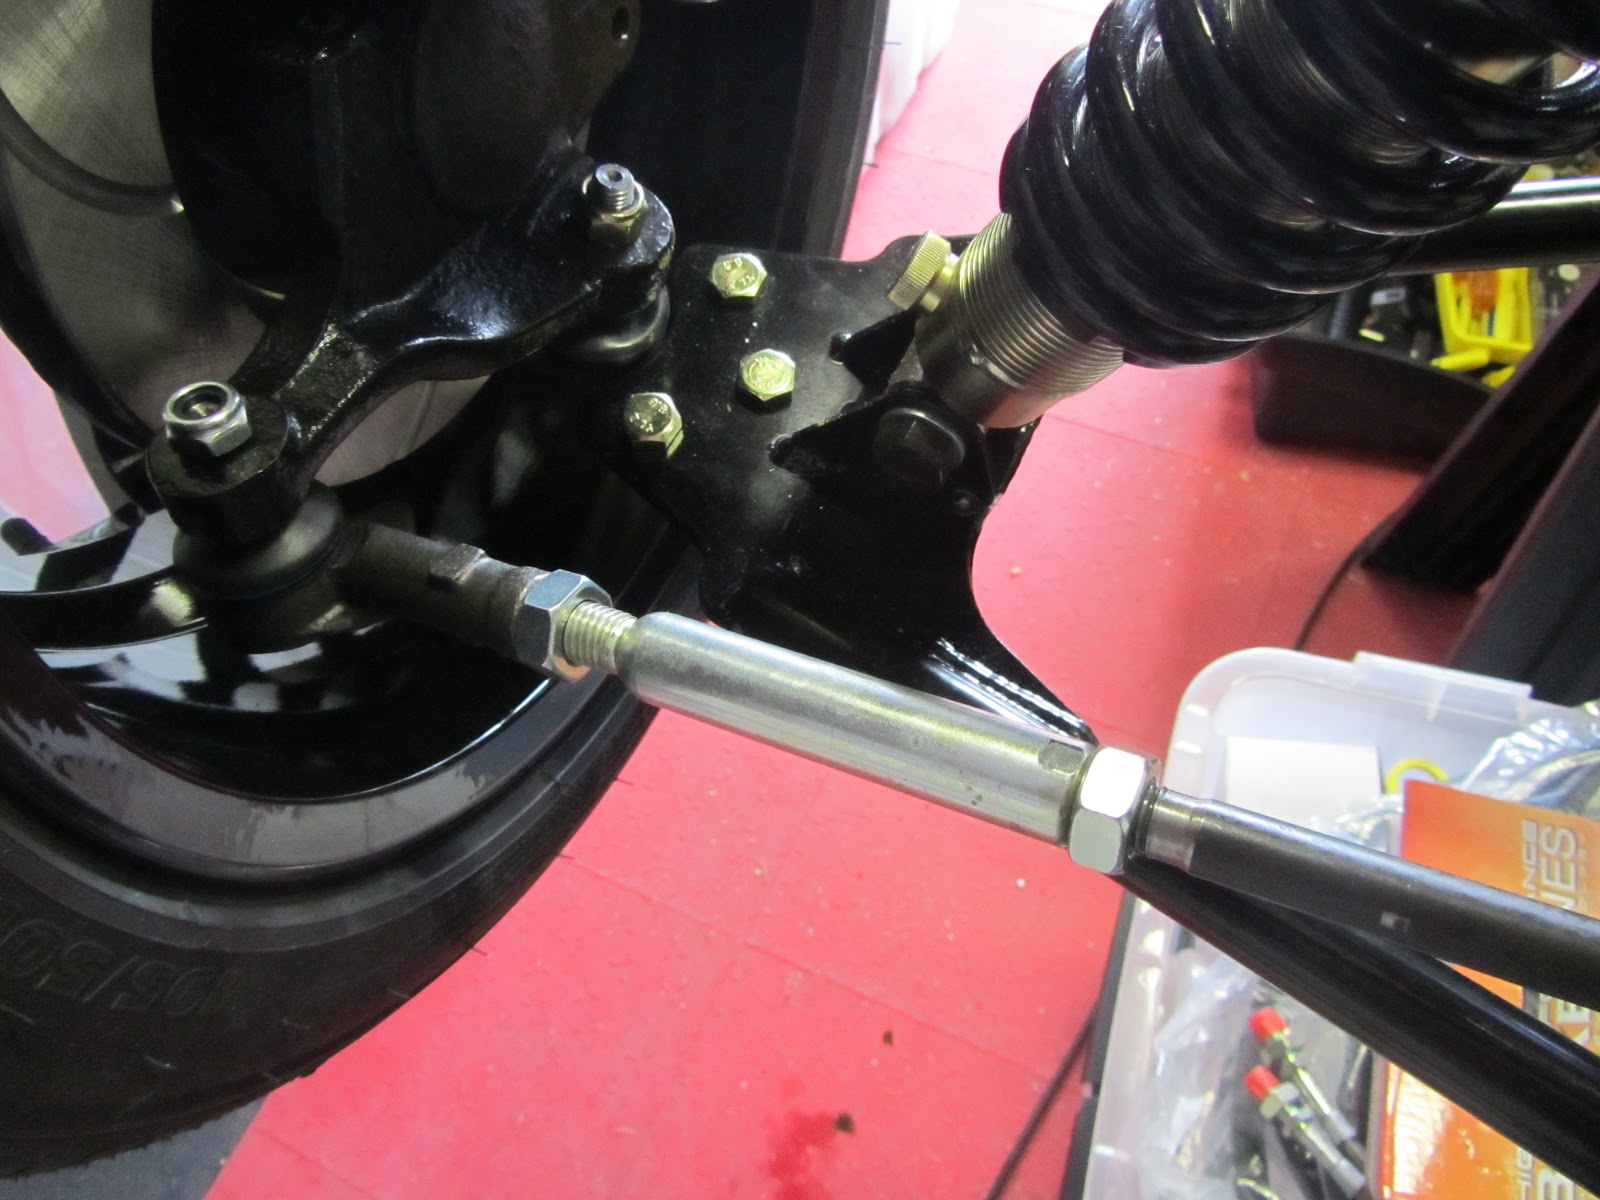
I had already fitted the steering rack but ran into problems with the standard GBS track rod extensions, they would only wind on about 1" and had noticeable rust on the internal threads.

I am taking the front suspension off again at some point & will be removing it as a single unit upright & wishbones - so the ball joints are not being tightened to the uprights & no IVA covers. I don't want to have to break those joints later.


The M14 x2 tap arrived today, so cleaned up the threads and had another go:

Initially again it looked like they would not wind on enough, I rang GBS - the advice is the extensions should wind all the way on to the steering rack - I'm nearly there, may re-tap at some point before final fitting. I can't see how this would be possible without cleaning the threads - the tap is a must have tool IMHO.

The extensions wind on freely enough not to spin the track rod arm itself; the balljoints need a spanner - I suspect its a dirty external thread on the extension, but hoping to get away without buying a die to clean that too.

Nearside needs a little more work - doesn't quite wind on enough yet:

Vertical clearance is tight over the suspension pivot points (GT chassis) I'll need to play with this again when the side panels are on, at the moment the nearside end is ok, but the offside a little tight: