Showing posts with label spare wheel. Show all posts

Friday, 12 April 2013

Spare wheel carrier #2

Its starting to get warm enough to work, but raining today so I decided to do a little construction.

My GT Chassis has a factory modification to allow fitting a spare wheel carrier, it needs fully fitting out including the wheel retaining bolts which in turn will allow me to finish carpeting the boot interior.

First up the bolts which retain the 'U' bar - these just needed cutting to length and a little fettling to get the U bar protruding the right depth for my tyre:

The U bar takes the tyre weight, then I decided on two threaded bars through the boot panel to steady and retain it. Behind the panel another plate of stainless bonded in place strengthens things and spreads the load:

My two threaded rods. I couldn't find M12x1.5 rod (the same as the wheel bolts) but did find M12x1.25 & some matching nylocs & locking wheel nuts:
Hindsight - I ended up fitting double nuts either side of the panel. This means they lock against each other and I can choose which one undoes - rather than the loosest one.

The threaded bars bolted in place with nylocs either side of the rear panel, on the inside this will be covered by carpet - leaving the bolts exposed so its possible to remove the wheel:

Then the wheel slips over them:

Hindsight - These nuts are doubled up now & a washer

Of course - this all has to come off for the IVA retest, the threaded rods will need some paint too to prevent a nice rust effect & a number plate bracket & light arrangement. 

Still - at least building things is a more positive experience than doing nothing waiting for the weather to clear!

Friday, 24 August 2012

Rear panel - two steps forward...

The rear panel has been on twice & I was planning maybe one more off-on, if I had to, to get the wiring into place;

Hokey-cokey


  1. First fit - to offer up the panel with shroud and drill rivet holes
  2. Second fit - came off to clean up the rivet holes and glue the trim to the shroud
  3. ...
I was making ready to start permanently riveting the rear panel, spare carrier fitted, drilled the holes ready for the fuel filler & cut the filler hose to size, started to route the rear loom - there wasn't quite enough room to get my hand in to thread the fog/reversing light cables through the panel holes;

Plan - remove the bottom clecos holding the panel and temporarily rotate it a little to give me some room to get the wires in.

When I removed the bottom clecos the panel slid home - tight against the bottom chassis rail - ie. about 5-10mm towards the front of the car - the position it should have been in all along! I had used the bottom edge/underside of the panel as a datum when originally marking out & it turns out this datum edge is slightly too long :)

You can see the panel sitting slightly off the chassis tube through the hole highlighted in this picture:

Options

I could leave it as was - which would mean drilling a couple more bolt holes on the spare carrier & might also cause problems with the defuser later.

  -or-

I could re-fit the panel, cutting a little from the bottom edge and have to re-drill the underside 12 rivet holes & some of the side rivet holes. On the plus side - the back of the panel will sit tight against the rear chassis rail & I know there will be no problem later with the diffuser. The panel needs to come off move anyway to allow threading of the rear lights wiring. <- This

Adjustments

The edges marked red were cut back around 5mm along their length, this lets the panel sit slightly more forward against the underside chassis tubes & the back corner sit tight on the back chassis rail:

Lessons

Don't use the bottom edge of the rear panel as a datum, use the pre-drilled holes where it attaches to the roll bar braces & adjust so the back corner sits tight on the bottom rear chassis tube.

I'm aiming for this to be the last time it comes off!

Spare wheel carrier - panel holes


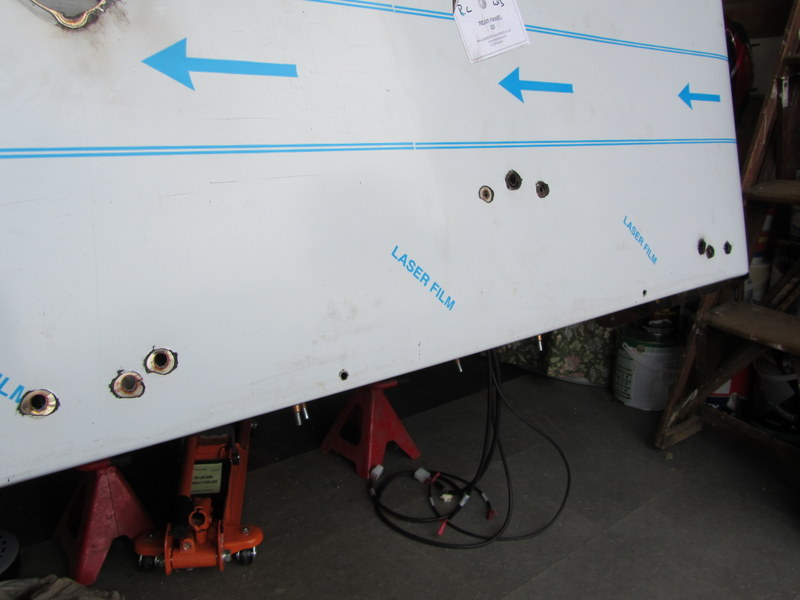
A round file does the job - slowly but surely, opening up the pilot hole to align with the chassis tubes behind:

I was a little more confident on the hole size & position for the offside & drilled a few more holes to speed things up:

Fitted - a little tight for the moment (needs my rubber mallet to remove it) and I pushed it too far in when trying the wheel in place, but good progress:

(I still need to drill through underneath for the locking bolts)

Thursday, 23 August 2012

Rear panel - trim, re-assembly & spare wheel holes


Finishing off the shroud drilling, ensuring the outside edge is lined up flush with the chassis tube, checking the tadpole trim will sit over the panel on the outside, and over the carpet on the inside:

Trim bonded on

Then dismantled,  I cut all the 'tadpole' trim & glued in place with a thin bead of bond. I cleaned the stainless with white spirit first to remove the greasy finger marks, and white spirit to hand on a rag incase any bond got on the facing side of the trim:

Flipped the right way up for the bond to go off, i.e. the arms bending the way they will on the car:

Re-assembly

I gave the bond a couple of hours to go off then drilled back through the rivet holes opening up holes in the trim underneath.

I drilled the pilot holes for the spare wheel carrier using the red marks made earlier then re assembled, with enough clecos to ensure the bottom edge is in the right place. Those ripples on the top trimmed edge go away when all the clecos/rivets are in place:

Open out the spare carrier holes - attempt

The plan was to use a Dremel router bit to open up those two pilot holes. I tried it first on an off-cut of stainless and it seemed to work well. Tried it on the back panel holes - the router bit caught/jamed  in the hole, came lose and flew off across the garage at incredible speed!

I was wearing eye protection & anyway didn't go in my direction but did result in smashing a spare double glazed door panel stored in the garage:

I took a step back and thought of options - more pilot holes? hacksaw blade? The best one seems to be manual with files opening out the holes to the right shape - 10 minutes with my modelling needle files got this far, I'll pickup some slightly larger ones and continue down this slow (but decidedly less dangerous) route.

Thursday, 21 June 2012

Removable spare wheel/luggage carrier

I had the chassis altered in manufacture to accommodate a removable spare wheel carrier. GBS did a great job - the only thing I would have done differently is thread the lower rather than upper holes. I am going to bond a couple of steel stainless + painted washers (steel over the hole to block it & painted to avoid any reaction with the ally fuel tank) between these holes and the fuel tank which sits above to avoid any possibility of a long bolt puncturing the tank.

It seems everyone does without spares on sevens, but it just feels wrong to me - so I hedged my bets, this carrier can be removed relatively simply if I end up doing track days or dually serve as a luggage rack. 

This will take the weight, and only need a threaded rod/securing cable and lock from the centre of the wheel through a hole in the back panel to secure it:


It is entirely within the height of the rear tube, so will need only a couple of holes in the back panel & will let me add a diffuser, which mounts flush with the underside of this chassis bar, in due course: