Showing posts with label grp. Show all posts

Saturday, 30 May 2015

Tyre wear, wheel arch adjustment

Noted in Scotland, My rear tyres were sometimes wearing against the rear wheel arch; especially when the car was fully laden: driver, passenger & luggage.

I had softened the shocks to 10 clicks which gave the rear end a little more bounce; The red circled area on the tyre is worn - but only the surface detail - it is hitting against the inside edge marked green when the suspension is on full compression.

15 minutes with the dremel, I took the wheel arch return edge back about 5mm on both sides, from 12 o'clock to 3 o'clock position & hardened up the rear shocks to +7 clicks in total. Combined this should mean the tyre just misses the arch - hopefully problem solved & invisible unless you crawl around on the ground and look for it:

Good excuse for a 50 mile test run around Kent; Maidstone, Bewl Water, Bedgebury and the scenic route back...

Saturday, 15 March 2014

Stone Guards

The stone guards were part of the original kit, I just never got around to fitting them; now with around 2k miles on the clock there are a few stone chips on the rear arches so makes sense to finish the job.

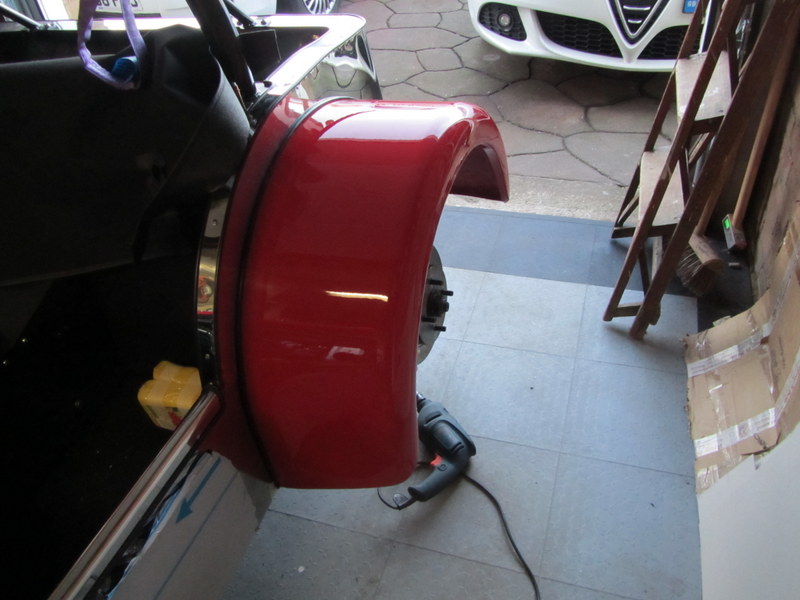
I had already trimmed them and shaped them to fit the arch:

I opted for some thin edge trim and rivets about 5cm apart: 

Sunday, 3 March 2013

Bonnet fit & nose attachment

I bought some neoprene self adhesive tape for around the bonnet; The idea being to take up any slack & foam to metal joint rather than metal to metal:


Nose trim - I'm not sure if this is completely necessary for IVA; i.e. its unlikely the tester can actually get the 65mm spehere on this edge; however for the sake of 10 minutes I installed the trim:

Detail on my nose mounting; my nose seemed to fit best inside the chassis tube 'A' brackets, so rather than install rivnuts I went for large washers etiher side and a nyloc on the inside:

This is the first time all the indicator circuits have been fitted: rear, front + repeaters & let me check the indicator flash speed is correct.

Sunday, 24 February 2013

Cycle wing brackets & final fit

The garage is hovering around 5-6ºC today, so should be just warm enough to keep the Sikaflex bond/glue happy.

The stuff I put on yesterday is solid enough to hold the wings so the straps & wheels can come off to give me access. Today is to finish the job with some angle brackets to increase the surface area the bond has to grip.

This is cut up plasterers beading - used for finishing outside corners but perfect for this job - light/galvanised only £1/metre and easy to cut & bend into the right shape. Picked up this idea from a discussion on RHoCAR & specifically a remark made by Shaft:

The brackets end up coated in bond, squeezed through the holes from behind - hopefully the wings will be firmly attached to the car once this cures completely:

I just want to leave everything pretty much alone & still now until this completely goes off. Certainly no playing with the engine today - anyway its more like 1-2ºC outside today so I don't really fancy rolling her out into the drive to tinker with the engine.

Saturday, 23 February 2013

Front (Cycle) Wings

The so called Cycle wings!

I had been putting this off for a while now; its just not a great fit between the round wing brackets - which whilst very robust do not sit exactly square against the wheel  & the sport wings I'm using. Theres not much room for adjustment either - the wings have to cover the entire width of the wheel & must cover at least 30º from vertical at the front.

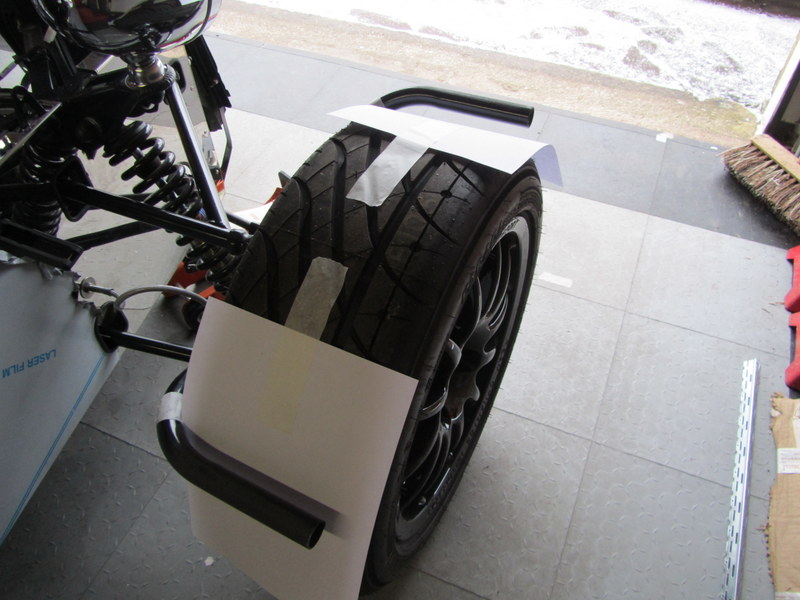
I prepared the bracket tubes with a little coarse sandpaper to give a keyed surface for the bond followed by white spirit on both surfaces to remove any dust; paper in place to avoid anything ending up on the tyre & went for it. 

I'm intending to bond the wings on; but also once this first fix is dry also use some plasterer's corner bead to make up some brackets and re-enforce the joint. The cornering is sitting bottom right on this picture and is perfect for the job - galvanised, holes for bond to push through, cheap & easy to cut in appropriate lengths:

First fix will be enough glue to hold the wings in the right place & let me get the tyres off later to reinforce the joint. The ratchet straps are not that tight - just enough force to hold the wing tight in place while the glue goes off:

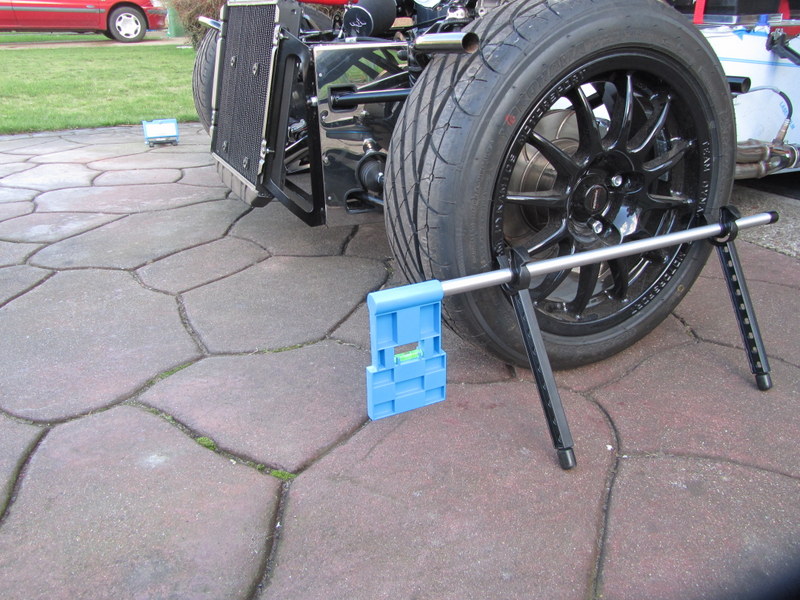
Measuring stick back in use to try and get both sides looking the same (note: the front edge on the sport wings is not horizontal by design):

All up... - it looks cockeyed from this picture - I'm taking the shot from close up (I hope thats the reason anyway :)  :

I'm going to leave it all alone overnight before moving the ratchet straps, taking the wheels off and finish reinforcing the joints.

Hindsight - I should have looked at these from the side of the car and could have lined the arches closer to the tyre profile. 

Sunday, 17 February 2013

Odds & S*ds - Tracking & Wings

Finishing various jobs today;

IVA Looming

I got an email from IVA Gillingham, asking me to get in touch and make an appointment for the test! Yikes - need to get a move on


First up was to turn the car around. My drive is on a slight incline so my thinking was if I have the front of the car just out of the garage it will be level enough to setup the tracking and give me more space either side to 'sight' the cycle wing positions.

This was the first time I manoeuvred the car out of the garage under her own power - so gearbox, clutch & brakes all put through their paces - in a very minor way.

Reversing light working, brake lights working

Slight weep from the now filled brake system - cured with a quarter turn on the pipe union.

Brake push rod

When I got the kit the very first job I did was the brake cylinder & pushrod - I cut the original rod far too short but now I have the brakes filled I created a pushrod of the correct length:


Adjusted the steel 'stop' in the pedal box which is adjusted to prevent the pedal moving too far back. The brake pedal is firm now - a good sign

Pinch Bolt backup

On to the final part of the pinch bolt modifications; I drilled and installed a couple of roll pins (just to the left of the pinch bolt/IVA cover in this picture). These 20mm 3mm diameter roll pins run through the casting and into the dummy upright - even if the bolt were to loosen they might save a catastrophic failure and give a little warning that something was wrong before the upright parted company with the wishbone:

Tracking

My first try at setting up the geometry; just basic front tracking for now. I obtained a TrackACE alignment kit and gave it a try. The principle is a laser bouncing from/to a fixed point and comparing the result between the wheels:

I spent some time finalising and torquing up the steering column and rack. Trying to at least start with the wheel close to centred. With hindsight I guess the car sorts the centering out itself when rolling & I'll need to adjust the steering wheel alignment again later.

Nearside first - everything is aligned so the laser travels twice across the car & hits the zero mark:

Then offside:

The result after my first attempt, I started at 2º toe in, and adjusted it back to 15' toe in - 2x complete turns on each track rod. I'm not sure yet the ideal position but its reasonably easy to adjust - by rotating the track rod assembly and winding each side in or out:

All booted up - the nuts will have to be covered for IVA due to the sharp/small radius edges:

Cycle wings

And last up while I had the front of the car outside I offered up the cycle wings. They really dont want to sit in any particular position so I'm going to sleep on it before making anything permanent. I think I'm close; sitting quite far back on the wheel (while also ensuring I have the appropriate 30º coverage at the front as required by IVA):

Without the nosecone the car looks very retro - like some 20s or 30s roadster with the big radiator up front.

Saturday, 2 February 2013

Wheel arches

Completing the wheel arches, I bought some more rivnuts in the week and finalised the nearside arch - then as a guide marked the holes I had used onto the offside.

I moved the bolt holes on the offside slightly closer to the outside edge which will help it fit better; There are lots of chassis tubes in the area the arches are attached & it was trickier than expected to miss them all:

Both arches in place - the car is wonky due to the offside still being up on an axle stand; I had some work to do with the fuel system so left the wheel off:

Rather ad-hoc placement of bolts - really just positioned to hold the arch on flush & uneven to avoid the chassis tubes under the side panel:

Addendum - after some thought overnight:
I took the arch off and fitted some edge trim along the inside; my thinking is twofold: it will give me another seal against the side panel & makes the edge level across its width taking into account the tadpole moulding on the other side. When the nearside wheel is next off I'll do the same to that arch.


Sunday, 27 January 2013

Nearside rear wheel arch

I want to get the silencer fitted so I can tinker with the engine without shaking & waking the house and neighbourhood - makes sense therefore to install the wheel arches so I know how much room I have to play with:

First offered up - trying to get the front and rear edge on the edge of the panels & high enough to cover the hole for the shock absorber. I've seen builds cut a crescent out for the shock - but I don't see why - the wheel arch doesn't get in the way of the mechanism - it would have to be removed to remove the shock though:

Once happy I marked the potential positions for bolts, trying to miss existing rivets, chassis tubes etc - then drilled the wheel arch, placed it back in position and traced through the location for rivnuts. Then a problem - 
    I'm virtually out of rivnuts :(

Still just enough to get things going - 6 of them in place here, & minor issue with the frontmost one - it happened to be in virtually the same location as the seatbelt mounting bolt on the other side - I'll have to move it a little upwards when I have a few more rivnuts:

It doesn't look too bad - the front half fits perfectly, the top and rear is not so great partly due to the rear panel side not being completely flat & partly because it needs another bolt fitting once I have more rivnuts:

All set to fit the silencer...

Sunday, 20 January 2013

Rear wheel arch trim

The rear wheel arches are next to get on the car, that in turn will allow me to complete the rear light clusters, boot cover & silencer.

Each arch has a run of 'tadpole trim' on the inside edge where it meets the car; first up preparation cutting out the inside edge to let it take the correct curve. I also noticed the trim has one side it likes to lay flat on, no difference to its appearance but probably easier to stick if its on its natural 'lay flat' side.

Preparation

I cut the length about 5-10cm too long & will trim that once everything is bonded and cured:

Mask up just to make sure no bond gets on the arch:

Bonding

Bead of bond, then pushed the trim into it. I didn't need any clamps its so sticky everything held in place without, then ran an old rag around to remove & smooth the excess:


Result

This is the result from the visible side - looks good to me:

Same procedure used for the other wheel arch, then they just need to cure & I can fit them.

Sunday, 6 January 2013

Nose Prep

My nose grille change means I have no access inside the nose once its on the car; so I setup a couple of cable tie points inside to bring the indicator wiring up where I can reach it when everything is fitted:

Thursday, 3 January 2013

Front mudguards

I'm waiting on some radiator fixing clips - to set off my chain of events for an egnine run i.e.
    Radiator clips
    Mount radiator
    Fit nose (for the last time)
    Fit bonnet catches
    Fit manifold (for the first & last time)
    Start the engine


Meanwhile; 


Time to prepare the front mudgaurds with their repeaters:

First up I checked them both; black = +ve, white = Ground; then 20mm holes to mount them; I used a spare washer for the template:

The step drill bit isn't my favourite tool - it tends to wander off centre & is difficult to control - it does leave a clean finish on GRP though & only needed a little further light filing to tidy up the reverse:

These do have a 'top' almost invisibly marked on the lens:

The G-clamps are to apply gentle pressure and hold the lamps in place; They have a bead of bond holding them tight applied from the inside:

Sunday, 9 December 2012

Nose & Bonnet fitting

A minor change in direction, I need to get the garage completely cleared for some maintenance on the ceiling/floor of the room above.

The car needs to be in as few pieces as possible so I can temporarily roll it out into the drive while work on the garage happens over the next couple of weeks; therefore - I thought fitting the nose would be a good idea.

First up, peeled back 5mm of plastic coating from the bonnet and installed the chrome 'like' edging to try and prevent excessive scratches. The bonnet also needed a little adjustment on the front end return edge to allow it to sit up tight against the nose:


Then offered the bonnet and nose up to the chassis to check location. The bonnet fit seems pretty well even thought it doesn't have its catches or locating pins yet:

Once I was happy, marked up & fitted 3x rivnuts on the bottom chassis rail with appropriate bolts/penny washers to attach the nosecone:

The radiator, indicators and nose edge trim are not installed yet; its a simple job to remove it now though 5x bolts and its off.