I decided to move on with the front suspension and get the rest of the bushes over with:
The kit now has a tube/spacer for the top of the shock, it was too long so I cut the nearside on in half. I prefer this to the offside (later) but still not entirely sure I like the narrow spacer - I need some more washers anyway so may do away with this and go with 5-6 washers instead..
Offside wishbones in place:
The top wishbone rear chassis bracket wasn't at all square, it must have deformed during welding - its probably ok, just needed a few more washers:
This side was wide enough to take the spacer as supplied (see nearside) however I'm really not happy with this, i.e. no room for a washer between the spacer & chassis, I'm either going to cut down the spacer and go with the approach on the nearside, or replace it all with washers:
Thats as far as I can go, waiting on order of an M18 tap to clean the top wishbone/balljoint thread & 2x M12 pinch bolts for the uprights.
Sunday, 17 June 2012
Saturday, 16 June 2012
Suspension washers and short bolts - correction
Categories:
chassis
,
suspension
Talking to Richard @ Newark, I realised my mistake and the reason for my bolts being apparently short.
I may leave the rear suspension as I have it - small & penny washers all round.
The front will be off again anyway to fit the side panels so will be small washers only.
Scenarios:
- Where the bolts go through the bottom of the rear hub, and a bolt head/nut faces up against a bush directly then - small & penny washers required to spread the load across the bush.
- In all other places where a bolt head/nut faces up against a chassis bracket only a small washer is required - thus I save about 2mm per bolt in length.
I may leave the rear suspension as I have it - small & penny washers all round.
The front will be off again anyway to fit the side panels so will be small washers only.
Friday, 15 June 2012
Front nearside wishbones
Categories:
chassis
,
suspension
Bottom balljoint and wishbone, no real issues except one of the three locking nuts which hold on the balljoint was slightly malformed and needed a little cleaning up with a file; balljoint nuts torqued:
Bolts downwards with the balljoint bracket underneath the wishbone; not critical but the weight when she is on her wheels is balljoint to wishbone rather than hanging off the bolts, and if any nuts lost then gravity holds in the bolts in (wishful thinking right?):
Started to try and fit the top balljoint, I think the IVA cover is still too long and I was too tired to work out how to screw this in without the locking nut moving as well. Then ran into an issue with the length of thread - it appears to run out of thread in the top wishbone tube before the ball join is screwed in fully.
Found its a known issue: RHOCar - Top Balljoint threads M18 1.5 Thread
Looking to get the nominal 48mm between the back of the lock nut and centre of the balljoint.
I'll take a look at Newark and see if I can get some advice.
Ahah! - opened all the bolt bags !
Categories:
chassis
,
suspension
I'm planning to go to the Newark Kit Car Show (provided the weather isnt so bad as to make the journey dangerous) , so also decided to check the bolts issue and make sure I pickup the right ones from GBS.
Issues at this point:
- Rear suspension 240mm bolt was bent
- Rear suspension top hub bolt too short 80 & 90mm in the bag, needs 2x 100mm instead
Actions:
I checked through all the remaining bolt bags, front upper/lower etc & the front lower bag had 2x 100mm bolts which don't appear to be needed.
Addendum:
I found out from Richard @ Newark, the 100mm bolts are for the narrow body chassis (mine is GT) where the top wishbone bolt goes through a chassis upright as well as its bracket - great - this means I can use them on the rear end and will not miss them later.
So - the 2x 100mm will be used for the rear top bolt... compare the lower bolt here with the previous picture using a 90mm bolt
Before:
After:
Then the 80 & 90mm bolts from the rear top bag can be used on the front top - the rear brackets need an 80mm bolt rather than 75mm - the 75mm was probably just ok, but I'm much happier with it now:
Resulting need list:
- 1x Rear suspension 240mm bolt replacement
- Swap the 90mm for an 80mm
- 2x Front Sierra hub pinch bolts (the ones that pinch the casting around the cycle wing bracket) Sierra pinch bolts discussion M12
I do just have a niggling feeling those 100mm bolts from the front lower wishbone bag were meant for something else - I'll check with GBS tomorrow.
Thursday, 14 June 2012
Gearbox mount fettle
Categories:
chassis
,
transmission
20 minutes with the hacksaw and the gearbox mount is ready to be lined up and drilled:
I'm just not sure yet if the fore/aft positioning is critical, i.e. I can potentially drill & fit it 20mm nearer/further from the front of the car - which will be dictated by the propshaft length etc - I need a combination of measure/offer gearbox & prop & ask GBS I think.
Checked with Richard @ GBS - provided the mount is central in the chassis hole it will be fine - no need to mount/offer up gearbox to check.
Finally fitted it to the chassis here: Gearbox mount
Sunday, 10 June 2012
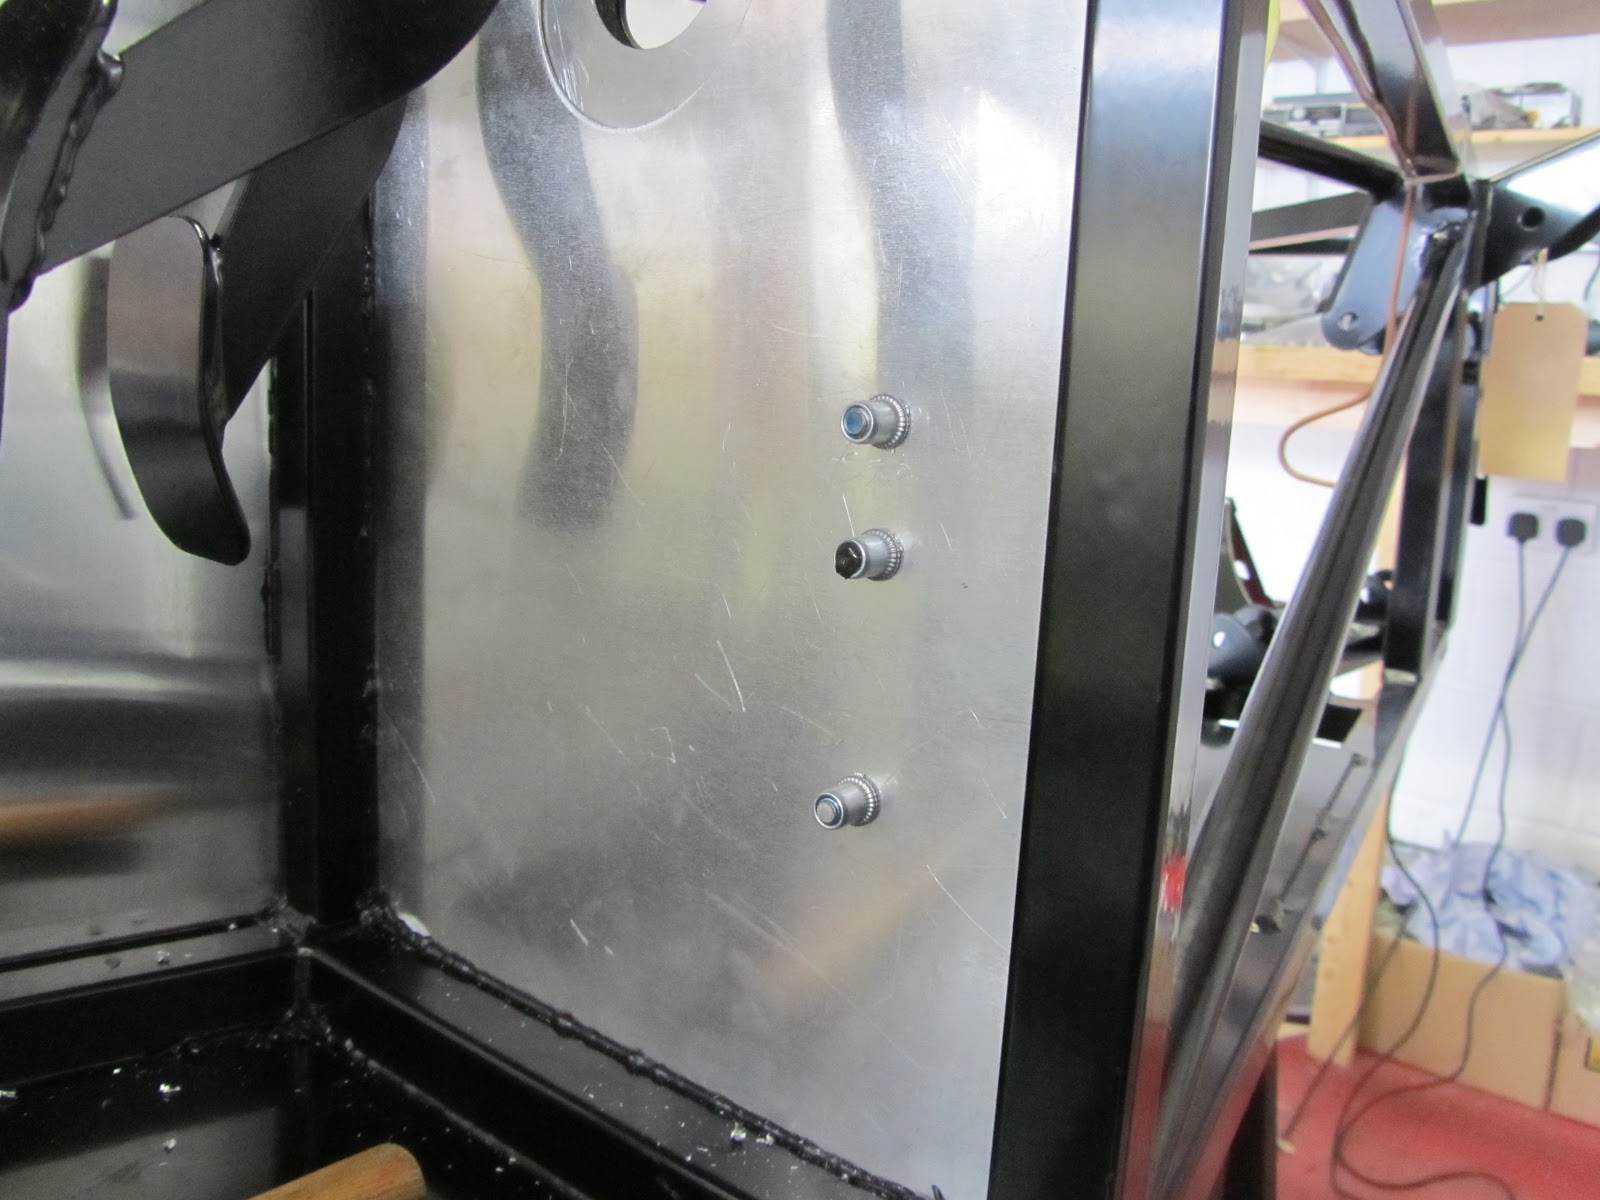
Rivnut tool & unrelated P clip test
So far this rivnut tool has worked well - its pretty slow but gives good control over pulling the rivnuts. Needs greasing every now and then to make sure it slides, then the MO is to tighten, then loosen & tap the screw with a hammer to loosen, allowing the black mandrel to be easily removed:
Test pull of a pop rivet through one of the plastic P clips - no problem at all, didn't crack the clip, so all set now permanently fix the brake lines with them:
High pressure fuel pump & swirl pot
Categories:
fuel
Destination for the fuel lines; The bracket for the Swirl Pot & next to it the HP Pump:
Trial and error with the fuel pump ties - one needed to be above the lip on the pump can so it cannot move up or down, I only worked this out after fitting it along with its main inlet hose - the hose was trying to push the pump upwards & would have easily pushed it right out with the vibration of running.
Note - hindsight - the pump needs to be fixed with metal clips or fuel proof ties - normal cable ties are not good enough.
I needed to get this bracket on before the side panels to get to the rivets:
Not a great example of drilling here - opposite chassis member combined with bad technique let the drill wander.
Rivnuts holding the fuel pump; the middle one plugged with bond and unused once I realised one attachment needed to be above the fuel pump lip:
All ready now to connect the fuel lines from the LP pump at the back to the swirl pot.
The swirl pot is attached by 4x rivnut & bolts to be removable, it looks skewed compared to the chassis tube, its square with the panel though, the tube runs at an angle.
(Still not completely happy with that brake line... it might move before it gets fixed)Trial and error with the fuel pump ties - one needed to be above the lip on the pump can so it cannot move up or down, I only worked this out after fitting it along with its main inlet hose - the hose was trying to push the pump upwards & would have easily pushed it right out with the vibration of running.
Note - hindsight - the pump needs to be fixed with metal clips or fuel proof ties - normal cable ties are not good enough.
I needed to get this bracket on before the side panels to get to the rivets:
Not a great example of drilling here - opposite chassis member combined with bad technique let the drill wander.
Rivnuts holding the fuel pump; the middle one plugged with bond and unused once I realised one attachment needed to be above the fuel pump lip:
All ready now to connect the fuel lines from the LP pump at the back to the swirl pot.
Saturday, 9 June 2012
Low Pressure fuel pump
Categories:
fuel
Rear fuel pump bracket, it comes pre-drilled with 4x holes - the one under the black filter needs opening up to 9mm for a rivnut, and then one on the right which is meant for the fuel pump - however I moved the pump a little to the right, its rear most mounting point also screws into the chassis & is not pre-drilled so must line up correctly.
Note - hindsight - the output side of the LP pump will leak unless PTFE tape is used for the brass insert.
(I swapped the filter jubilee clip round after this picture to make sure I have access when the bracket is installed)
Chassis rivnuts in place - 9mm holes required:
Closest and left hand one are dictated by the pre-drilled holes in the bracket.
Right hand furthest is located as the back rubber mount on the pump.
The fuel pump and filter installed:
From above, as per the instructions ensuring the jubilee clips are accessible from above through the boot floor access panel.
Wishbone bushes
Categories:
chassis
,
suspension
Spent 2 hours fitting bushes and crush tubes:
- Offside rear bushes x14 & crush tubes x7
- Nearside front top bushes x4 & crush tubes x2, copper grease the thread
- Nearside bottom, offside top & offside bottom to go.
My Process
- Clean powder coat from wishbone tubes with drum sanding kit
- Lightly grease the wishbone tube & bush
- Push the bush in place with G-clamp and vice
- Use calipers to find width of the bush pair
- Grind crush tube to this width
- Lightly grease the crush tube and push in with G-Clamp
Had enough of bushes - taking a break
Friday, 8 June 2012
Rear nearside wishbones
Categories:
chassis
,
suspension
I made a start on the suspension;
Pushing in the bushes was fine, I cleaned up the powder coat on the wishbones first with the drum sander attachment then applied a little grease. The bushes are very tight; started them carefully with a G-clamp and appropriate wood blocks to stop damage, then wound them home with the vice.
Rang GBS to double check on washers and installation and was told:
(Top nut here will have a penny washer too when I get the longer bolts)
The holes for the shock needed the wishbone powder coat carefully removing, I used the side of a smaller (8mm in the 10mm hole) drill bit to clean it out taking care not to actually widen the hole.
I understand here, between the wishbone and hub carrier on the inside, its important to have a washer; cleaned off the powder coat on the hub carrier so it fitted nicely.
This is the supplied 90mm bolt, I've not tightened the nyloc, no point - it needs another 10mm to be long enough.
Must have tool in my opinion, and a bargain at B&Q:
Note;
I did try fitting this wishbone (before the advice from GBS) and in forcing washers in managed to bend (not sure if I bent it or not - anyhow - its bent and needs replacing) one of the long 240mm bolts which runs through the bottom of the hub carrier.
Note;
The top bolt through the hub carrier needs to be about 100mm + long, and neither of the supplied kit bolts are long enough.
Nothing torqued up yet, I have read elsewhere it needs to be sitting on its wheels before tightening the suspension bolts.
Pushing in the bushes was fine, I cleaned up the powder coat on the wishbones first with the drum sander attachment then applied a little grease. The bushes are very tight; started them carefully with a G-clamp and appropriate wood blocks to stop damage, then wound them home with the vice.
Rang GBS to double check on washers and installation and was told:
- Crush tubes to be the same length as the bushes are wide to give a flush face
- Large penny washers against the chassis components with a smaller washer to spread the load from the bolt head/nut
- Fit penny washers as required between the wishbones and brackets to be snug and avoid bending the brackets when tightening
- On the hub carrier - fit washers either side against the wishbone bushes
- Aim for a 'snug' fit
It took me 2-3 fittings to get things right first trying with crush tubes as delivered - about 0.5-1mm longer than the bushings, then after realising it looked wrong and calling GBS for the above advice, purchased a bench grinder from B&Q and did it properly!
I'm much happier with it now, just need a replacement long bottom bolt which I managed to bend, and the top bolts which are too short.
(Top nut here will have a penny washer too when I get the longer bolts)
The holes for the shock needed the wishbone powder coat carefully removing, I used the side of a smaller (8mm in the 10mm hole) drill bit to clean it out taking care not to actually widen the hole.
I understand here, between the wishbone and hub carrier on the inside, its important to have a washer; cleaned off the powder coat on the hub carrier so it fitted nicely.
This is the supplied 90mm bolt, I've not tightened the nyloc, no point - it needs another 10mm to be long enough.
Must have tool in my opinion, and a bargain at B&Q:
Note;
I did try fitting this wishbone (before the advice from GBS) and in forcing washers in managed to bend (not sure if I bent it or not - anyhow - its bent and needs replacing) one of the long 240mm bolts which runs through the bottom of the hub carrier.
Note;
The top bolt through the hub carrier needs to be about 100mm + long, and neither of the supplied kit bolts are long enough.
Nothing torqued up yet, I have read elsewhere it needs to be sitting on its wheels before tightening the suspension bolts.
Subscribe to:
Posts
(
Atom
)