Thursday, 21 May 2020

Head cleanup and measure

Note - As with every part of this build - this is the first time I've done it - this is NOT a manual - its my record of what I did.

Is it flat... enough?

Haynes manual spec says: "Maximum permissible gasket surface distortion 0.1mm"
Acquired a straightedge with spec: "Tolerance below 0.03mm"
Feeler gauges: 0.04mm upwards.


Prep

While tools were on order research via a selection of youtube videos + read the Haynes manual for the engine and consult with some trusted sources.

Very light cleaning with light oil, soft softwood scraper, then isopropyl alcohol to remove any gasket residue and then inside the cylinder/valve area lubricated lightly with engine oil again and left to dry.

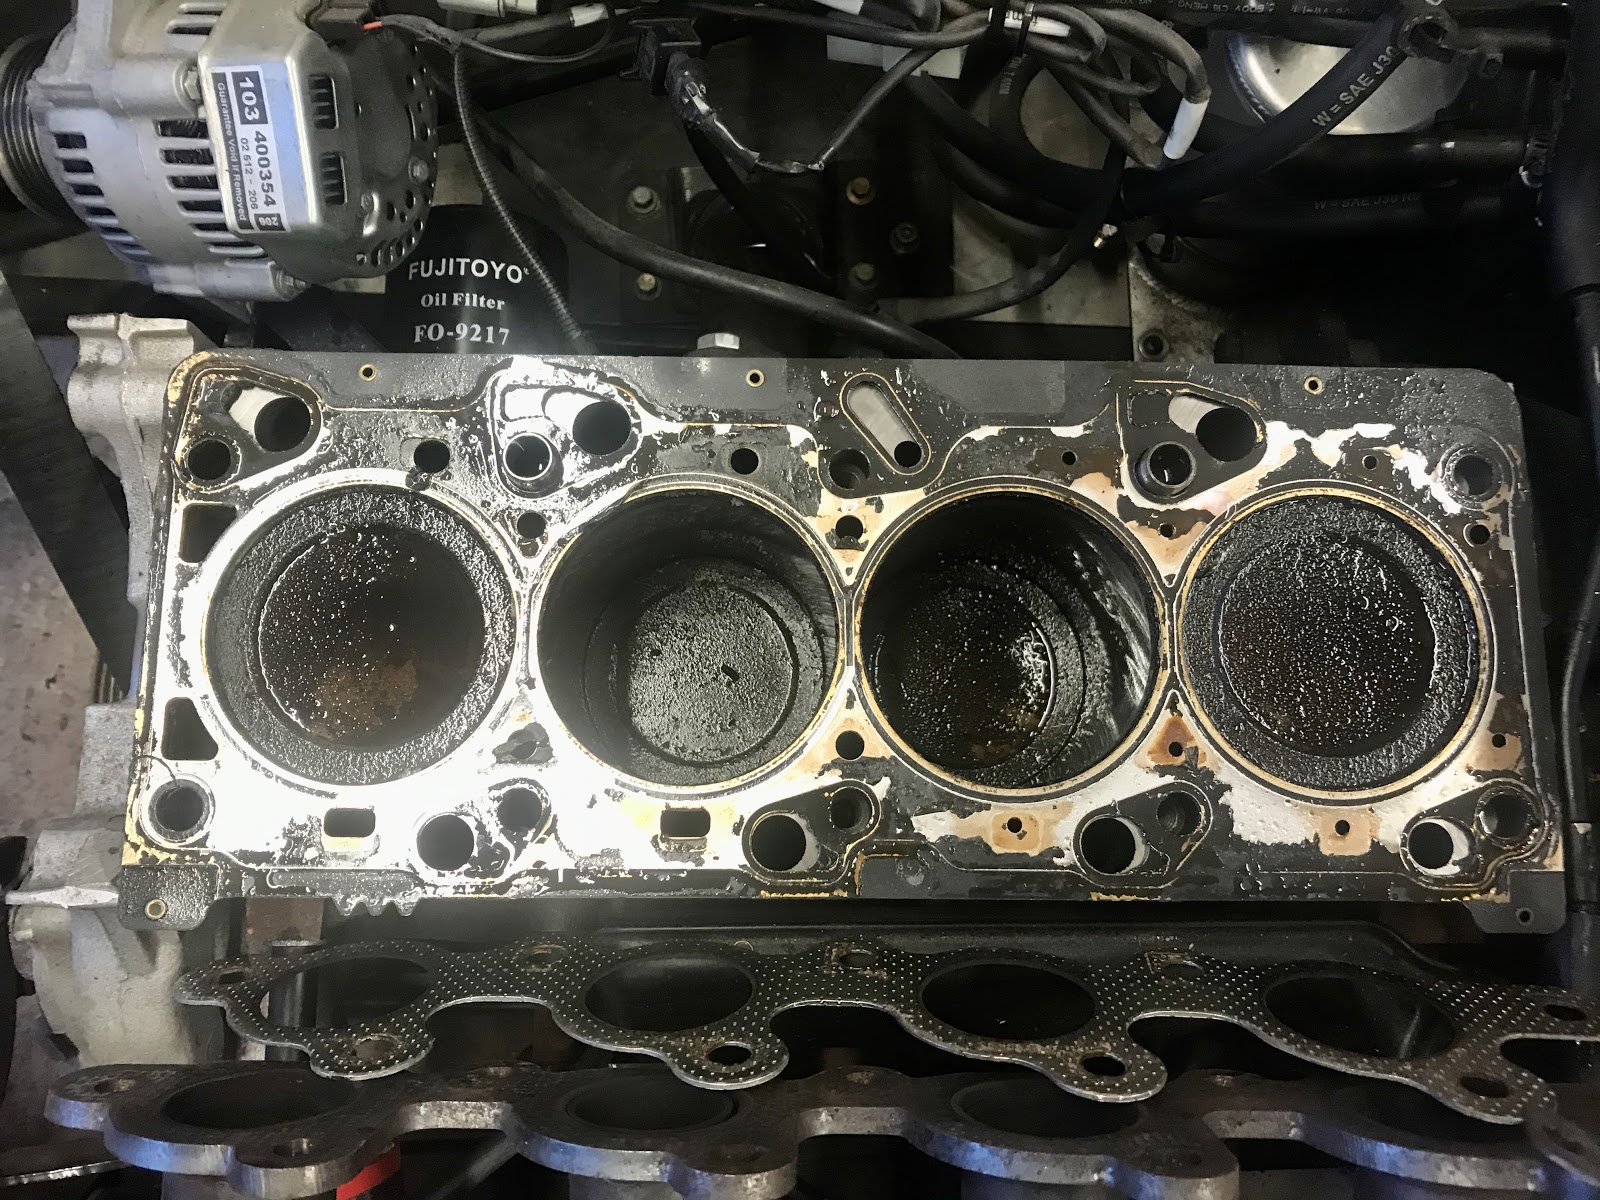
The gasket left behind random bits of its rubber coating which sort of peeled off in places. Some discolouration visible, but also the original machining marks visible which must be a good sign that its clean.

It feels smooth to the touch - which sounds like a daft measurement - but fingertips are incredibly sensitive to local distortion - better than sight anyway - useless for overall bend across the whole component though.

Measurement errors

Built in I have potential error of 0.03mm from the straightedge, therefore worst case the ruler could be making the head look flatter than it is by 0.03mm (if they both bend in the same direction - top scribble).

If the head bends the other way to the straightedge error then it would make things look worse  (bottom scribble) of course I can't tell which if either is happening.


Therefore to detect the worst case I need to measure 0.1-0.03 = 0.07mm flatness or better to be within spec head flatness. Take off some for errors in the measuring process and I went for a 0.05mm feeler.

Am I kidding myself - or - is that logical?


Measuring points the obvious long directions, but also diagonals and really any flat between any holes. This picture showing the sort of pattern I adopted, repeated across all cylinders/head bolt holes.

Measure method #1

Lay the straightedge on the block, attempt to slide the 0.05mm gauge underneath, checking all obvious flats and paths between openings.


Measure method #2

Lift either end of the straightedge by a known amount - 1 thickness printer paper - and using a feeler of the same thickness as the paper (or even more of the same paper) check for any differences - loose or tight spots. (Thanks for this concept Graham)

The advantage here is the thickness of feeler is no longer critical to the measurement. I can measure down to the 0.03mm straightedge tolerance with a paper thickness feeler. The gauge should make it under with that little 'grab' you would expect in all places/directions. The paper may depress during the process - but even that should get me a fail safe/better resolution.

Result

So far - all good - consistent, no low spots no high spots identified with either method.


Left it for a day or so and repeated to make sure its not just my wishful thinking that its flat and make sure I'm comfortable with this stage before making the re-assemble vs skim decision.

Friday, 15 May 2020

Head off

The head is coming off hopefully just to replace the gasket but that depends if everything is still within spec.

Why am I doing this

The failure I believe is due to overheat caused by a failing temp sensor and lack of fan cooling when the car was stationary. i.e. I believe I have identified the root cause before this attempted fix.

Disconnecting ancillaries

Step one is dismantling, the head is coming off but to release it there are a number of steps.

Intake side: Injection rail, cam position sensor, plenum - inc accelerator cable and air temp sensor, alternator brackets x2
Exhaust side: Water rail, exhaust manifold.

First look under the cam cover and some tale-tale white on the bolt tops - coolant in the oil, corroborates the CO2 detection kit so she definitely had to come apart.

Cam shafts and followers

Water pump pulley to release the cam belt cover and cam belt, cam shafts out..

Cam followers all labelled to go back in the same place.

Parts table and boxes to try and stay organised.

Head bolts, nothing particularly noteworthy - they're not going back in.

Head

The head lifts off - a surprisingly delicate component for a heavy block of aluminium - oil and coolant channels everywhere and the valves smaller than you might expect packed together in each cylinder. A really impressive piece of engineering - no less impressive that they were built in the tens of thousands to the same standard.

Block

Cylinders carboned up after best part of 30k miles. Pictured with the old gasket in place and removed and liberal oil soak to clean.

First stage done.

It's all had a soak of WD40 and will sit overnight under a rag to help with cleaning and measuring up to see if everything is still flat. The operational spec on the head is max out of flat by 0.1mm!

The bigger challenge is can I put it back together and get it operational?
Worst case this will become an engine rebuild job for an engineering firm.


Update - Received knowledge (thank you) - WD40 is less than ideal for this job - it cleans, but it also strips any other lubricant or surface coating which can induce surface rust. I've since cleaned up and made sure the parts that matter have an engine oil soak/coating to ensure lubrication is maintained.

Saturday, 9 May 2020

It's not quite over yet...

Monthly engine turn over and warm yesterday - usual routine while the car isn't running to get the oil circulating etc. All looked ok, heated up mighty quick though and the fan was staying on - struggling to keep the temp under control - all at tick-over.

Thought I'd give it another go this afternoon - checked the coolant level and it took a litre or so top up hmmm...

Checked the coolant for CO2 and bingo -  blue to green...
...combustion gases in the coolant.

Plugs all look clean:

Dipstick looks good - golden oil, filler cap maybe a sign of milkiness - but could be condensation:

Compression test looks nominal getting on for 175 PSI - no particular low cylinder, I don't have the equipment to do a leak down test.

Quick chat on the Facebook enthusiasts group to get another pair of eyes/sets of brains/experience... advice is to check if the coolant system will still hold pressure if not and especially if it leaks into the cylinders then QED.

Theory - The temp sensor failure causing overheat in UK traffic on the way back from Norway pushed the head gasket over the edge. The car made it home - partly due to less traffic and a freezing night. I'm going with the temp sensor root cause, which is now corrected, unless I find any other evidence.

Broken out the Haynes manual for some reading...

Something new to learn, parts to find and order.

Monday, 23 March 2020

Not going out

Covid-19 in the UK - clarity from the PM this evening -  now is not the time for discretionary motoring.

RL13 is formally off the road, staying garaged and with its regular engine warm up instead of run outs.

Obligatory 'No!' in-my-face reminder reminiscent of Apollo 13 pre LEM separation scene.

Frustrating yes, weather perfect for driving yes...

Is driving RL13 ever a necessary trip - NO


#StayAtHome


Saturday, 4 January 2020

New coolant temp sensor

New parts arrived - a couple of thermostats at original 92ºC and 88ºC and ECU coolant temp sensor.
Standard 54mm/2" thermostat, drilled with a 4mm bypass hole to allow circulation before it opens - I thought I'd replace this anyway while the housing was open.

Confirming the failure point

Next up comparing the temp sensors, the new one is from Emerald however took a few minutes to double check before replacing. The part number is E450 on both, I think the 4011 and 0418 on the reverse must be manufacture dates - week number and year.

The old sensor read approx 9k ohms and the new one - in a similar room temp environment only 3k ohms. They drop resistance as temp rises so that would be consistent with the old one thinking the engine was colder than reality and therefore not turning on the radiator fan.

Double checked in the ECU software - the old sensor (left) thinks the ambient temp in the garage is 4ºC below and goes up to around 70ºC max. The new showing a much more sensible number - QED - sensor failure but within range so the ECU just wasn't turning on the radiator fan.

While I was here I checked no sensor connected - at which point the ECU reports 80ºC but also turns on the radiator fan.


Reassembly

A little fiddly to get the ECU sensor in under the dash one - requires removing both of them - but relatively straightforward.

Thermostat

I'm going to try a slightly lower thermostat value to let coolant into the radiator a little earlier at 88ºC which should let the radiator smooth the top of the warmup curve before the fan has to kick in 10ºC later. Should help things when the car is stationary and hopefully doesn't affect things significantly when moving airflow is present.

(Horizontal scale here doesn't mean anything - its just representative, Yellow where coolant is admitted to the radiator, and green the fan kicking in.)
Thermostat back in its home.

That was good - nice clear failure component identified, hopefully the new one lasts another 7 years.


Option/thought - there is a thermostat mounting point in my radiator - would just need a radiator mounted switch which grounds the lead on ECU Pin6 (or the other end of it on the fan relay).

Friday, 27 December 2019

Cooling system - maintenance

On the way back from Norway the car decided to chuck out all its coolant and peg the temp gauge at best part of 130ºC. After letting it cool and topping up the coolant everything was fine - but it was a particularly cold night coming back - so possibly just got away with it due to forward motion?

Today I let the car run at idle, part of its static monthly exercise, running up to full water temp and letting the oil circulate.... the coolant gauge again jumped up over max temp and on switch off blew the bulk of its coolant out of the overflow onto the garage floor.

Something then is still not right.

I wasn't really watching it so not sure if the radiator fan cut in when the engine was running.

Tests so far

Confirmed the ECU is seeing a temp reading - check
Used the ECU software to check the ECU could turn the radiator fan on - check

Swapped the fan relay with the aux panel one to confirm identical behaviour - check
Removed the thermostat and checked it opened around nominal 91ºC - check

Next up, monitor the ECU temp reading and see if its seeing the coolant temp rising and see if the fan relay keeps flipping - not sure if that is because the battery is low due to the car not running?
...

Update - sensor replaced issue fixed.

Friday, 20 December 2019

Heater upgrade - 2

Air box for the new fan progressing...
Taken from the paper template then adjusted for even gaps top/bottom to accept rubber trim.


While everyting is in bits, the tunnel heater vents are changing too - rectangular peg into a round hole - but will mean I can reach them when buckled into the seatbelts.

The small cover panel will be at least blacked out and possibly carpeted so shouldn't notice once complete.

That should do the trick.

New ducts, the new vents need 55mm rather than the existing 50mm.


The important bit - just reachable from the seated/belted position.

Friday, 6 December 2019

Heater upgrade - 1

Finally got around to some car work. 

Upgrading the existing heater fan to a squirrel cage from the original axial fan. The axial fan moves air - but can't generate significant pressure - I'm hoping the new fan will improve on that without tipping me over my current budget.

The space I have to work with. The heater radiator hoses will stay outside the air box.

Mocked up the new bracket and airbox to draw fresh air in from above, through the bonnet vents with offset more space on the drivers side where the fan intake will be.

Starting with the fan bracket, 1mm aluminium but seems sturdy enough once the panel has flanges added.


Offered up - looks ok so far.
Some challenges with fouling the pedal box lid bolts - might be as simple as a shortened bolt in the back position.

It's a 3 speed fan - I'm intending just to have one setting - On or Off - no point in finesse of air speed in an open top Zero + avoids any changes to the dashboard controls.

Air box surrounding the lot to follow.