Sunday, 26 January 2014

Tonneau - nearside lid

I spent some time mulling over the options for the top tonnau 'lid' sections - decided on two separate pieces to give most options when driving the car i.e.
  - Sides on only when there is a passenger
  - Sides + nearside lid when driver only
  - Sides + both sides lid to keep weather out when parked outside

Tried the template approach again and a simple back of envelope plan:
Flaps over the zips to keep out the worst of the weather, and initially I was going to have the offside much wider - to cover the tunnel and enclose the driving position as much as possible.

A test run (with string between the lift-the-dot studs) identified the best solution - the lid needs to allow a little more width at the back for shoulder space so runs from the rightmost front stud to the rear left one:

 Marking up the template:

And - only 5 hours later! - the final cover.

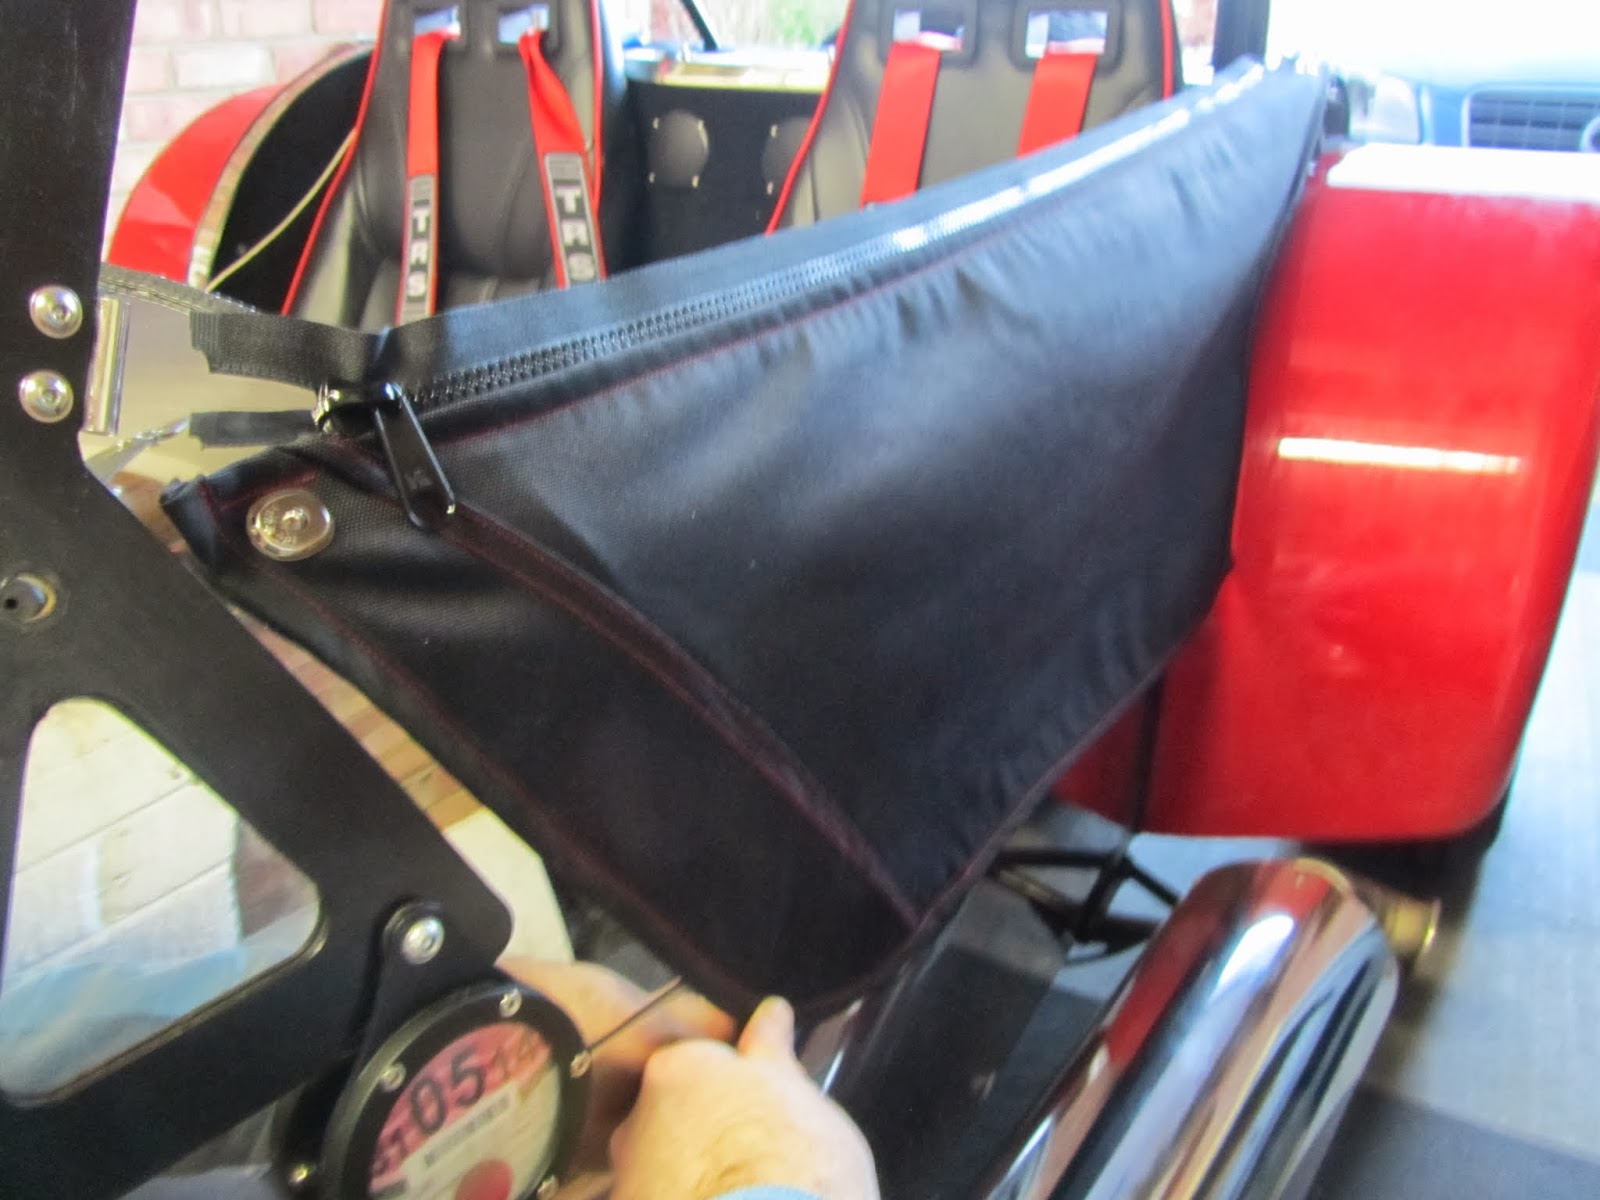
It was partly template driven, but mostly fitted to the car with frequent fitting tests between steps. Cardboard template made for the seat pouch which was simple enough to make in itself but a real s*d to sew into the main flat cover - hopefully the drivers side one will be easier now I have had a little practice:

Test fit on the car, but not tensioned up yet. Its never going to be a drum-tight tonneau, more a lightweight cover to keep the worst of the weather off & compact enough to all roll up into a corner of the boot. You can see the offset centre line - to give more shoulder room to the driver:


Getting there - its also coming out neat enough. The red contrasting stitching is a double edged sword - on one hand all the stitching is visible & in your face if there is a mistake, on the other hand I don't even have to try to hide the stitching on the bias tape edgings or zips because its a feature.

Might need a flexible pole across the cab for overnight stops to avoid a puddle in the middle.

Friday, 24 January 2014

Front mud-guards

Borrowed an idea from Bill Rees' Blog, for front mud guards / mud flaps. His description of arriving back with grit & road chippings in your seat/cab area struck a chord.

Stock universal flat guards from ebay, modified slightly - easily cut with a wood saw - and bolted in place:

Taking care to protect the tyre when drilling the holes:

The Tonneau is still in progress - I just get distracted easily & this job didn't need holes drilled in the bodywork,  quick win.

Sunday, 19 January 2014

Tonneau - studs & one side on

Installing the studs; I have various kinds, where I can get to the back of them its a simple threaded stud and nyloc nut. Where I can't I'm either lining up with a chasis tube and tapping an M5 hole or using rivet on studs.

Windscreen off for access to the scuttle & a row of 6 studs laid out low tech string to get them in a line:

Couple more between the seats, these two are installed in tapped holes in  the chassis tube beneath:

Fitting a side/door panel

Turned out I made the side panels too short - the original size would have put the fixing stud on the wrong side of the dash panel and visible from inside the car. Time spent today re-working the offside one to extend the front edge 2" - it fits fine now; just waiting on a couple more lift the dot bases to hold the bottom edge in place:

Getting there slowly.

Saturday, 18 January 2014

Tonneau - side doors

I'm working upwards now - if the roof doesn't happen I still need a way to enclose the car to stop it turning into a bathtub and filling with water. I'm going to keep things simple and build a tonneau - a four part design, side 'doors' and then covers over the top connected with zips.

Inspiration - woven shower curtain fabric makes a much better pattern material & only a fiver for 2m square. The datum is a string running from the windscreen bracket back around the roll bar sides:
Hindsight - The leading edge might do with some more fabric here and run right up to the windscreen bracket, especially if the mounting clips will sit behind the dash face.

Offside door complete - I have some heavy duty zips along the top edge for attaching other parts and simple bias tape edging to keep everything looking tidy. I'm intending to fit the doors completely first then measure for the rest of the cover - that should compensate for any errors/inaccuracy in making up each part.

Plenty of googling for videos on sewing & especially bias tape, its good stuff though - means I only need a hem along the straight zip edge - and gives a good finish even on curves:

On the inside no lining, but some reenforcement on the corners where it will be attached to the car:

Both sides complete & pretty much the same shape & stitching (on the outside) is presentable. Working with fabric is difficult 'everything' moves all the time but I think its turning out ok:


Tomorrow I intend having a go at fitting them - the plan is lift-the-dot fasteners so there is no way they can get blown off; the trick will be installing the fasteners to miss chassis tubes & get the right tension on the fabric panels.

Sunday, 29 December 2013

Hood frame

Over the Christmas break I did a little work on the roof frame but forgot to blog - its not finished - and another pause before I go further.

The pivots either side are in place, spring side is locked in place and tensions the spring, the other end is free to rotate:

The roller does spin on its spring as required:

The theory being it can be moved into place while inside the car unfurling the roof as it goes:

All well and good - just still not decided on the windscreen mounting method...  the old sheet I was using as template material was not working - far too stretchy and not really letting me work out the shape of fabric required.

Still needs some more thought.

Update - discarded this idea, it's just too complicated and not really worth it compared with a simple surrey top or a more traditional roof frame. For now I'm sticking with a surrey top fastened to the windscreen frame and over the roll bar.

Sunday, 15 December 2013

California style self rolling roof

Too much reading of Slomove's Birkini, His half hood is more for the California sun than rain protection, however - looked like an interesting concept so, not having much luck with my First hood design, I thought I would try and re-create it.

The concept is to have a hood which can be opened & closed while in the car, utilising a roller spring (roller blind) as the central support to furl and unfurl the roof fabric. No idea if it will work really...

First up the roller blind mechanism, I got one with nylon/plastic ends so they are easily dismantled  & modified - but possibly also slightly weaker? One end free wheels, the other larger end is locked in place & tensions the spring. I don't need the automatic position locking so the ball bearing & associated mechanism can all go:

Paired down the locking end with my Dremel to end up with the hexagonal nut which will slide inside the struts, reduced the height of one brass bush & reduced the internal height of the cage which holds the roll tube - the last part is to expose more of the central pivot shaft:

The locking end now will slide inside the support tube but will stop the shaft rotating. Offerred up the entire end components to check, may need some adjustment but looks ok:

The other end is simpler, this just free wheels; so modified to take an M6 bolt through the centre and will be simply bolted loosely to the other tube: 

Next up I wanted to try improve on Slomove's design a little and put a dog leg bend in the support tubes, this should ensure they don't impact comfort, hitting my shoulder, when the roof is open. A little prototyping with a coat-hanger to get the right shape then on to some 16mm aluminium tubes.

A RhoCar member kindly offered use of his pipe bender, I was impatient though, bought a spring bender and had a go myself. The bends are not perfect & not strictly identical, but will do the job:

When closed the struct sits back along the roll bar & away from the passenger shoulder. When open the top point reaches exactly half way along the roof line:

Few more parts ordered from Ebay & the next task is to work out exactly where the pivot point will be avoiding the internal structure in the side panels & drill some mounting holes. I'm intending to mount with a couple of rivnuts in the side panel and a threaded knob of some sort to make everything removable.

Update - This never worked properly, so I have not used it; its much simpler to create/buy a surrey/half hood simply strung between the roll bar and top of the windscreen.

Sunday, 1 December 2013

Wind deflectors V2

I Started thinking about doors, but ended up re-working the wind deflector design. The door template ended up being incredibly long so really if doors are going on the hinge point should be further back than the windscreen pillar.

I only had enough 4mm PETG left for one side so built a template and one deflector to check it out - each deflector is about 2' tall & 16" deep. I ran into problems bending the PETG, the combined factors of colder ambient temperature and large area of plastic meant it was a real struggle to get enough heat into it and bend.. I may have to invest in a cheap heat gun for the other side & give my wife her hair dryer back.


The deflector comes back roughly level with the back of the steering wheel but not so far it impedes getting in/out of the car:

I took it out for a little test run - this is certainly an improvement over my first design, now I can feel the heater air around the wheel and less need for gloves especially on the offside hand. The 4mm PETG is very stable, no movement/flutter or vibration even at speed.

The next step to think about is a secure fixing against the side of the car & a simple hinge arrangement for half/full doors off the trailing edge. I think these deflectors will effectively be permanent, possible lift off doors to be fixed to their rear edge, possible re-enforcing aluminium U channel along the trailing edge.

Update - reverted to the original simple design for a couple of years now, don't deflect the wind as much as stop the front wheels catapulting anything from the road into my face.

Saturday, 23 November 2013

Polyswitch for permanent live

I have an FIA cutoff/kill switch between the battery and the car for security purposes as much as anything. The downside is this means when the FIA cutoff is open no power to the immobiliser 'flashing led' or the radio memory. The option I'm taking is a polyswitch across the FIA cutoff to supply a continuous low current voltage event when the battery is otherwise isolated:

The polyswitch behaves like a self resetting fuse, permitting approx 3A current before it effectively breaks the circuit by heating up and increasing its own resistance. This allows a standby current to virtually everything but prevents the engine being started. Once the polyswitch cools down after a second or so its back to normal. I found one which is rated 16v 3A stable, tripping current 5A.

Functionality is
FIA switch open - (3A max draw) radio memory, immobiliser flashing light works, trips if you try to start the engine.
FIA switch closed - everything functions normally including starting/running the engine.

Fitting
Made up this mini loom and the loops go over either side of the FIA main terminals, the polyswitch itself is the tiny blob which looks like a ceramic capacitor. This ceramic part sits on a small aluminium plate to make sure when it heats up it cannot contact anything else:

Learning
This arrangement is not compatible with a full cutoff circuit that also grounds the alternator via a large resistor. If both the grounding resistor and polyswitch are left in place when the FIA switch is opened (key removed) the grounding resistor draws the tripping current permanently and everything gets very hot. (Learned the hard way - but before any magic smoke was released :)

I'm assuming the FIA switch is a break before make, so no simple way around this - seems you either setup the car with a cutoff that will actually stop the engine & not harm the alternator, or as I have now as an isolator switch which should not be opened when the engine is running.

Update - removed when the fusebox was next open and now these permanent feeds have their own direct fused circuit from the battery.

Friday, 22 November 2013

Badges - Fin. "Zero"


To complete the set (Roundels & Flags) some smart Chrome/Enamel metal lettering for the model name:


Its certainly nothing like the standard GBS Model badge, but I prefer it - just retro enough & hopefully will help with the standard  'What is it?' question when people see the car.

The acid test will be how long the letters stay stuck on!

Found online from here: Something Magic


Standard questions so far being:

  • What is it?
  • Is that as fun to drive as it looks?
  • What type of engine, how fast does it go?

Sunday, 17 November 2013

GBS Badges

I spent Saturday at the Classic Motor Show & while I was there picked up some pre-ordered badges from the GBS stand. Its a while since I went to the show - and I don't recall it being so massive before - it seems to take over the entire NEC now - not kits but classic cars/bikes/auto-jumble etc. I don't think I saw Lotus or any Sevens other than GBS.

GBS had the white demonstrator and red Mazda based demonstrator on show. GBS Facebook Show page has a picture of the stand, there were a few tens of thousands more people about when I dropped in mid morning:

I'm still not convinced on a nose badge & anyway the bonnet is already sporting Union Flags & don't want to get too busy.

Opted for the steering wheel centre and boot badges:


Custom 'Zero' model badge to come for that space under the GBS roundel later...