Sunday, 28 April 2019

Grease the prop-shaft

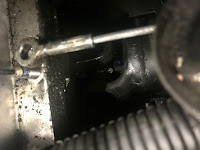
Maintenance - make sure the prop-shaft UJs are full of grease. New flexible grease gun hose made this much easier, theres not enough room to clamp on a normal gun end it needs a cone/needle attachment.

Aft requires the handbrake cable crescent removing, the nipple buried deep centre frame, fore slightly easier to access: 

Handbrake cable looked fine around the crescent, good and greasy no obvious wear.

Countersunk seat bolts

I saw another builder with virtually flush seat mounts on the GBS Zero Owners & Enthusiasts Group, Looked much better than nuts/bolts on the outside and worth copying the approach.

Some Googling and searching on eBay turned up a whole line of undiscovered products designed for Go-kart seat mounting. Kart countersunk seat washers in alloy, nylon and titanium. Perfect.

My mount stack retaining the 50mm square washers inside to spread the load and thick washers above as spacers.


M10x25mm bolts were ok, 30-35mm would have been even better - my new learning for today is countersunk bolts are measured over their entire length including the head. I decided on alloy countersunk washers at about £5 for 10.

On the other side my initial thought was to use T-Nuts in the seat rail, so they cannot rotate when tightening - theres no room for a spanner in here. However - thinking through, not really keen on the robustness of these - I want my seats staying attached to the floor under all circumstances.


The option I decided on - especially since seat attachment strength is critical to safety - known good M10 nyloc flange nuts with flanges ground down so they fit inside the seat rail but cannot rotate. Should have been stainless really but I had none to hand.

Very fiddly to get the nut in place on top of the seat rail and tighten, but overall the finish looks much better to me.


Comparison part way through the job - passenger side closest with say 5mm or so below the floor pans, old style bolts still on the drivers side with at least 12-13mm for the nut alone. Looks tidy enough although the floor pans are not as flat as they used to be.

Hindsight and patience would have avoided my mix of metals - stainless bolt, BZP nut etc.

Tuesday, 23 April 2019

MOT - Monmouth MOT Centre

New location, new MOT testing station.

Monmouth MOT Centre thoroughly checked over the car for best part of an hour.
The tester poker faced throughout - very professional - I always find it stressful having anyone else check my work. Very necessary though, I trust my life to this machine.

Success!

Passed with one advisory - I need to check the handbrake cable - operational but something may be binding somewhere.

12 Months more on the road and MOT date shifted a little earlier in the year. Moving it slowly to the beginning of the driving season rather than right in the middle.

Sunday, 14 April 2019

Check for the missing valve collet

All procedures followed as per the Haynes Ford Focus manual - this entry is not an instruction,  I'm not listing all the steps or any of the torques, it's merely a record of the procedure.

Process driving after finding a valve collet in the oil pump intake filter, I need to know where it came from.


Dismantle

Plugs removed and checked, they all look clean to me, no discolouration on the insulators, no damage on the electrodes.

First step - engine to #1 cylinder TDC with a rod sitting in spark plug #1 hole as a visual reference to the piston position.

The bearing caps are numbered, I penned in same to make things more obvious, they have to go back in the same place and orientation.

Bearing caps loosened in sequence and removed,


Belt and braces parts laid out as they were removed and labeled Intake/Exhaust/Front etc,

Check the lifters

Looking for a missing collet at the top of the valve stems, the lifters pull out easily with a suction cup.

I checked all 16 but nothing a miss - the collets just visible between the spring cap and the end of the valve shaft at the bottom of each well. 

Good news then! at least I don't have to struggle removing / re-installing valve springs, just need to put it all back together.

The head casting looks rough around the end oil galleries, its the same on all of them so I guess just 'good enough', theres no swarf coming out in oil changes so its not degrading in any way.

Re-assembly

Crank back 90º so the pistons are all clear of the valves, then camshafts placed in and torqued down in stages and in order as per the Haynes manual procedure. The front caps also have sealant around the front edges.

Bearing faces oiled before assembly and all bolts wiped down to ensure no oil on the threads.
Both camshaft oil seals and the cam cover seal replaced at the same time.


Valve timing

I've been here before, just takes concentration to avoid doing something daft or missing a step.

Camshafts sitting the same way up as on disassembly and the locking bar slid in from behind,

Crank locking pin installed in the block and the crank gently turned to sit against it,


Timing belt over the pulleys which are then tightened to lock them in place and finally the tension roller adjusted so its built in indicator arrow lines up with the slot at the back.

As per procedure, remove the timing lock bar and pin then carefully turn the engine via the crank pulley 2x revolutions and double checked/adjusted the belt tension.

Then the sundries:
  Plugs, HT leads, Aux belt, Aux tensioner, nose back on, indicators reconnected.


Done!

On one hand a waste of energy dismantling the top of the engine just to reassembly it. 
On the other I had no choice but to check! 

It would appear someone dropped the collet during the engine build at Ford's Bridgend plant in Wales sometime in 2004.


Took RL13 for a test drive, everything running as it should.


Next job - number place lights have blown and MOT required there's always something :)

Tuesday, 9 April 2019

Timing belt bottom cover

The engine is coming apart, aux belt off etc, so also a chance to tidy up some other jobs.

When I changed the timing belt in 2015 I couldn't loosen the harmonic balance pulley, somehow I got the bottom plastic cover off (in pieces) but couldn't get a new one back on.

Now I have the right tool for the job - an electric impact wrench.
Car in gear, handbrake on and the bolt/pulley is removed.

Good amount of gunge sitting around the open bottom sprocket,

Cleaned up the muck and now much neater with the cover in place,

Pulley re-installed at around 115nm of torque - torque wrench to 112Nm (its maximum) followed by a good buzz with the impact wrench to make sure.

Much better and what I should have done the first time.

Sunday, 7 April 2019

8x275 rear springs

While I ponder the valve collet, decided to get on with the job intended for today: longer springs on the back.

275lb/inch staying - but going to 8" long springs - same length as the originals. 

Pictured:
   8"x250lb/inch  - as supplied with the original kit from GBS
   8"x275lb/inch  - final springs - same length as originals but upgraded 'spring'

Its obvious and written on them what they are - problem was I didn't make a note of that prior to the original build and ordered my 7x275's before dismantling the rear end. 

Level is approximately right now, 120mm at the front, 130mm at the back - will check again after the next drive out. Much happier with these springs, I didn't need to put anywhere near as much pre-tensioning in for the ride height required.

Note
All sizes relate to Ford based circa 2012 car with my weight as the driver - milage will vary on other Zeros. The principle of same dimension spring varying springyness seems to be good though.

Unwanted present post oil change

Time to spend some time on maintenance, and what I thought would be another simple oil & oil filter change.

Ran for a few minutes to warm things up, side drain open, nice black but probably still servicable oil. As usual 5 litres out, 5 litres in - so despite the drips under the car I'm not losing much/any in day to day running.

No swarf in the oil coming out - good sign.

The front drain plug gives access to the oil pickup filter. I thought it may have been leaking/weeping around the bottom of the plug so for the first time since the build intending to take this out, inspect and clean up.


Left is the oil pickup filter/grille and its drain plug, right the main oil drain plug. I'm replacing the blank original aluminium washers, top, with seal insert Dowty washers, bottom. (Stainless new washers on the ali sump may not have been the best idea - may change it)

Spare part - loose valve collet

This, what appears to be a valve collet, was sitting inside the oil pickup filter.


I have no idea how long its been there. To get to that location it has managed to get to the sump and be sucked back up by the oil take up then lodged in the grille.

It looks in clean undamaged as-new condition, hopefully that means it made the journey through the engine via the oil galleries and not by forging its own path through the cylinders or block, its plainly a very hard component, but surely would show some witness if it went through the engine?

No sign of issues when the engine was running, for obvious reasons I'm not running it again though.

Nothing out of place looking at the top of the engine, cams, followers etc, so some planning required before moving to the next step.

Update - removed the cams/lifters etc and inspected all the valves - nothing amiss, the collet is a spare part.