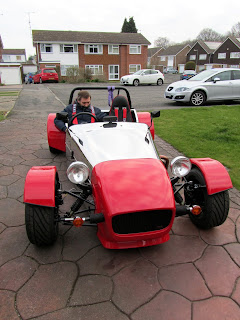
Friday, 29 March 2013

Prototype exhaust baffle

In the quest to quieten the exhaust 2dbA @ 4875rpm best advice is a baffle. 

The design of the GBS silencer precludes a standard baffle in the tailpipe (it might take one in the inlet pipe), so my first attempt is the wire wool approach. I created a cage from some galvanised mesh - the wire wool loops around the centre section and back on itself which stops it being blown out of the cage:

First attempt - too much wool and my 'baffle' turned into a mini missile as the engine simply pushed it out. Second try I reduced the amount of wool by about 50% (relative to this picture) and everything seemed to stay in place, turning it 90º as it is fed in the tailpipe lets me slide the whole assembly a resonable amount inside:

The next step is to do some measuring to check its actually making a difference & decide how to keep this in the tailpipe - it needs more than just friction, possibly a bolt through the underside? - I need to think that through before making permanent changes:

Promising start though...

Thought - The regulation says I the exhaust can have 'manufacturers drainage holes' so probably hooking one of the cage wires through one of those will do the trick?

Update - I need to confirm how far the lambda testing probe is inserted - it may mean I need to keep the tailpipe completely clear and sort out the baffle on the intake end of the silencer.

Steering rack adjustment

IVA picked up on the steering rack boots; the nearside boot was resting on the lower wishbone mount & offside was rubbing on the side panel when on full lock.

The only way I could get the rack centrally through the panel cutouts & missing the wishbone mounts was to raise it both sides; I made a couple of shims from off-cut aluminium sheet to lift the offside end 3mm:

I also filed back the corner of the chassis bracket to allow a few more mm height, making sure the rack lip still overlapped the chassis bracket to give left/right stability (Filed area was painted over after this picture):
Looking at this picture, I might replace the bolts with slightly longer ones - I'm right on the limit now

On the nearside I moved the thick spacer plate above the chassis mount - again to give a little more clearance over the wishbone mounts. I think I'm ok now - pictures of offside & nearside when on full lock - the boots don't touch anything now across the full steering travel:

The gaiters actually sit right above the wishbone 'U' brackets, which this picture doesn't show clearly - i.e. although they are miles above the wishbone end itself its that vertical edge on the chassis bracket they are very close to.

Sunday, 24 March 2013

Brakes and Mirrors

Brakes

Invested in a can of brake and clutch cleaner & ensured the brake discs & pads all round were thoroughly de-greased. 

I re flared the front offside pipe, it was originally my first flare and although the fronts were fine on the IVA test I'm much happier with this effort. I was expecting, note the plastic catch tray, lots of leaking fluid - but not nearly as bad as I thought, the viscosity of the fluid in the lines & closed on the other end means very little leaks out during the process:

Once all re-assembled I applied some brake & clutch de-grease fluid all round then bled the entire system, ensuring the rear callipers were fully upside down (meant removing the handbrake lines to do so). I hope this has made a difference.

Hindsight - of course all brake lines should be double flared not single as in this picture.


Mirror vibration

Vibrating wing mirrors mentioned on the test; I re-purposed the large dish washers which are not used on the headlight mounts, adjusting them to fit the inside contour of the scuttle and re-fitted. Its certainly better than it was:

Inside the scuttle showing my makeshift washer:

I understand GBS use custom mounts for the factory cars which mount through the windscreen holes.

Friday, 22 March 2013

Silencer bracket guard

One of my fail points was the rear silencer fixing. GBS haven't had any issues with this and  installed, as I have done, with the hook turned inwards so the 100mm sphere cannot contact any sharp edges. However its the spring itself & the two black lugs on the bracket which my inspector had issue with, I think he was almost disappointed at not being able to get at those corners on the hook & couldn't find any other exerior (or interior) projections :)

I could argue the point, but this one is relatively easily solved with a heat shield style guard. Regulation states any contactable edge must be rolled 180º back on itself - other than that I think I'm ok. I attached it with a jubilee clip to the existing bracket:

My metalwork isn't up to the point where this coould be polished so I've opted for the brushed finish. The guard is 1.5mm aluminium but doesn't touch the exhaust anywhere so heat shouldn't be a problem:

I think the 100mm sphere will only touch the trailing edge, which I hammered back on itself & can't get at the jubilee clip or underneath. The guard sits on & bent around the silencer bracket just where it goes into a 'Y' shape so its locked solidly in place:

I hope thats ticks the box on this issue.

Hindsight - I might fold back the bottom outside edge too - just to make sure

Update - This disappointingly fell off on the first long run due to vibration fatigue. For the second round IVA a much simpler approach - a strip of rubber approx 10cmx2cm cable tied onto the spring.

Lambda sensor leak

Removed and re-seated the lambda sensor, this time with exhaust sealant so hopefully no leaks. I re-worked the exhaust wrap around this area too - much neater now & jubilee clips to hold it in place rather than the stainless cable ties. I've never worked out how to pull the stainless cable ties tight they always seem to slip back 3-4mm:

Rear brakes: correct braking force

I need to keep the momentum going - so at least moving ahead on the fixes I have a solution for - the noise & emissions will wait...


I made a start on the rear brakes; I failed on rear braking force both from the foot brake and parking brake. I'm going to start with the callipers and work forwards - eventually re-bleeding the whole system.

For today I removed the pads & used a little de-greaser then light sanding to ensure there was no residual storage oil. There was plenty of black brake dust so they must be doing something. I de-greased the disks and re-installed everything.

Next step will be to bleed the system & check the hand brake lines.


I want to re-visit the offside front brake line, its not leaking exactly - It was my first attempt at flaring a pipe and while its 'ok' now I have a little time I'm going to do it again. The downside will be removing the nose for access & then draining and re-filling the brake lines which I wasn't in the mood for today.

Note - didn't need to drain the lines, very little fluid leaks out with just one connection removed.

Thursday, 21 March 2013

IVA - First try

Just back from the IVA

The appointment was for 8.30 am,  30 minute journey, but I set off at 7am to ensure I avoided as much traffic as possible and give myself some leway for any simple fixes en-route.

Car went like a bomb :) !!!
Couldn't help putting my foot down driving up Blue Bell hill; the limiting factor only my eyes without a windscreen at 70mph. Its the same feeling I had when Richard @ GBS took me for the test run last May & the clincher on the purchase. Its quite un-nerving at first to see the front wheels moving through the suspension range - but as close to fully open wheel you can legally get on the road.

Lots of concentration reversing out of the drive:

The big Sierra steering wheel looks a bit odd; but its a must for the tests:

Gloves on & Hat went on @ Maidstone - it was about about 6ºC today but luckily no rain:


I arrived at Gillingham with plenty of time and spent the day with the team there checking the car over. 3-4 Caterhams passing through on tests too. My tests ran from around 8.30 through 4pm; lots of tea on offer from the staff at the station & found a bacon sarny van around the corner for lunch - what more could you ask for!

Bottom line - failed on a fair number of points - some expected some not - most I can fix, a couple I'll need to think through the options;

Fail list:

  1. Noise - 101.2dbA recorded & needs to be under 99dbA
  2. Metered Emissions - first run the high rev range was fine but rich on idle, even with me tinkering it didn't seem to help so gave it up as a bad job. There is also noticed a small exhaust  leak around the lambda sensor which cannot be helping.
  3. Steering Effort - the steering rack gaiters were touching the bottom wishbone mount on one side & touching the side panel when on full lock the other.
  4. Indirect Vision - my side mirrors had too much shake/vibration. They are actually flexing the scuttle panel so possibly need some re-enforcement inside.
  5. Parking brake - took too much effort to get the required performance (see next item)
  6. Brake Performance - Rear not enough performance generally, whilst either side was balanced theres not enough braking force on the back end.
  7. Exterior Projections - The spring clip (the spring part) which secures the end of the silencer and lugs it hooks onto could be touched by the sphere. Suggestion is a small heat shield style guard around this area.

Fixed on site during the test:

  1. Headlamps - aligned using the test centre equipment.
  2. General Construction - a couple of areas where the engine loom needed a cable tie to secure it completely, notably the cable which connects to the injectors & my trim around the exhaust hole in the bonnet melted & had to be removed.

Informal discussion and suggestions

  1. Lock washers on the prop shaft bolts - I had thread lock which was good enough
  2. Fuel tank earthing - my explanation of the sender earth also bonded to the main tank was - good enough

Its a long enough list - but most items I can sort out myself.

The Noise may be related to the engine running too rich -or- could be my fault for advertising too high max revs on the forms. It might just be an excuse to book some time with HT Racing up the road at Brands Hatch to get it tuned correctly.

The rear brakes need a double check all around - re-bleed, check the pad condition, de-grease discs etc. I did de-grease the front discs & left the rears alone - to make sure the fronts out performed them - possibly I should have de-greased all round.

Possibly I'll use a local garage to run an MOT style test for me too before the next IVA attempt.

The re-test rules are 6 months to get through with as many re-tests as required (for a fee)


Excellent day - friendly team & VOSA Gillingham - Thanks Lawrence & colleagues.
Not a pass - but one step closer to getting her on the road & 33 miles on the clock.

Wednesday, 20 March 2013

IVA Prep

All set for tomorrow & the test.

I just did a dummy run in my primary vehicle to check the route in person, settled on the second of my two options, no speed bumps etc so it should be fine. Paperwork assembled, some basic tools in the car & fuel tank full.

Checked the tyre pressures, water, oil etc, fixed the sat-nav to the dash.

I just need to remember to wake up in time & a little luck with the weather and it should make for an interesting morning at the very least.

Tuesday, 19 March 2013

Fin (for now)

Dash board in and bolted & we are all set for the IVA inspection on Thursday:


I have a couple of jobs to complete tomorrow adjusting the ECU - but I think thats it as far as construction goes.

The car has 2 miles on the clock right now, from my speedo tests up on jacks, if I make it to the IVA testing station and back it will be more like 22 on Thursday!

Nearside footwell covering

My under scuttle area, nearside, is somewhere more cluttered than the standard build due to my heater taking up the central position and fusebox, ECU being over to the left. I think I'm ok re radiuses here since its all sitting behind the diagonal chassis tube - however - I'm decided to cover the area and neaten things up.

This is a 99p door mat from the local supermarket & some 6mm trim fixings from Ebay. 4x holes in the cross rail for the traim fixings to clip into, they are locked in place by pushing the central pin, and unlocked just as easily for access: 

This took me the standard three attempts to get just right, the first two tries ended up being templates. Incredibly laborious process which would have been easy if I'd done it before the scuttle went on and seats in - did end up in the obligatory upside down position drilling the holes (no picture!)

I think it works ok; I'll spend some time looking at it as I drive and see how long it stays. Now I have the shape worked out I can replace with some carpet to match the floors if I need to:

Note - this cover wasn't needed for IVA, It was removed/re-installed during the test so the inspector could see the cabling setup. It does tidy up the space a little though.

Brake calliper trim

On the quest to remove sharp edges; The front brake callipers have a couple of sharp corners where the brake line screws in & the nut on the line itself is contactable with a 100mm sphere (IVA Exterior projections section 16) and fall outside the wishbone exempt area (same section).

I recall reading on a forum someone getting picked up on this too.

I decided the easiest way to handle these was light dremel to round off the corners of the calliper casting & some rubber tape secured around the nuts.

Before:
After:

(Ditto on the offside)

The inboard end is fine (I think) since the nut is against the side of the car a 100mm sphere would not contact it - I'll take some more rubber tape to the inspection just in case!

Monday, 18 March 2013

Belfast Marathon...

Nothing to do with the car; however my wife is running the Belfast Marathon this year and in the process raising funds for the Kent Autistic Trust;

If you enjoy reading my blog on the Zero build please consider a small donation to Anne's run & the Charity via her Just Giving page:


Please Donate to the Kent Autistic Trust here: Donate

Thank you.


Update - Anne completed the Marathon, a personal best & life time achievement - this is the first one she has finished. She also raised over £500 for the cause.

Thank you.

ECU Injection corrections

A little reasonable weather so time to make inroads on the ECU settings.

The engine has been running fine, but starting is poor and tick-over once up to temperature poor.
I went through the IACV setup one more time as per Emerald documentation 

Then adjusted the Injection corrections - the key table which helped was changing the Coolant temp correction.

Originally to get the engine started (without accelerator) I increased the initial injection prime - what I hadn't touched yet was the coolant temp adjustment - this increases injection by a percentage amount depending on coolant temp - by manually adjusting injection to get a clean run/idle you can then calculate the percentage increase needed at various temperature points;

So far I have one data point:  +11% @ 92º    

Even using just this single data point and calculating a straight line across the others makes a huge difference - waiting for the engine to cool now so I can get a few more data points. Needing an overall increase at this coolant temp may well be an indication the whole map needs revising - possibly my OEM fuel pressure gauge delivers slightly less juice than the engine GBS had mapped.

Update - I'm going to have another play with ECU settings - probably shift this +11% to the main map rather than on the temperature ajustment map since at 70º+ there shouldn't really be an across the board (all sites) increase.

The challenge for the novice (me) is fuel & air have to be in balance to get a smooth run & its difficult to tell which variable to change - i.e. more injection works up to a point then you need to balance with more air or it just richens the mixture and goes lumpy; similarly - more air generally increases revs until you go past that sweet spot and its over lean.


I will update the ECU page as I settle on particular settings.


Wing mirror nut covers

The wing mirrors have nuts with corners on the outside of the car, so I made some covers from the remains of the steering arm covers:


There is still and edge where the mirror screws on to the pillar, I'm not sure what to do about that.

Rear view mirror

I have the week off work to prep the car and take it to IVA.


I have not decided long term on a rear view mirror style, so for now I'm using a standard replacement mirror from Halfords mounted on the scuttle. Its designed to stick to a windscreen so doesn't quite have enough adjustment for the right angle. I made a small plywood wedge to sit underneath:

Looking at the pictures, I may have to round off some of those rear facing corners before this is fitted.


The bonus is there will always be somewhere to 'touch wood' for luck now (I'm superstitious :)
Just needs a permanent glue pad to fix it on the top of the scuttle area.

Sunday, 17 March 2013

Aux panel final fit

The aux panel should have just bolted into place - it needed a little adjustment due to the tilted heater position & then s*ds law a couple of the rivnuts I installed were not seated correctly & rotated in their holes as I tightened the bolts. I had fitted them through the carpet, tunnel panel and into the chassis tube which was too much depth.  I re-fitted the rivnuts by removing the carpet first then lined up the bolt holes using my centre punch as a make shift marlin spike:

The dash area is almost done; I need to make a decision as to whether I am covering the passenger side leg space & then the dash can go back in permanently.

While I was working on this I noticed the steering column was wobbling...   the bottom bush had slipped out of its housing & with the pedal box now complete it was very difficult to get in there to push it back in place. Pedal box cover came off, brake pushrod out & then there was just enough room to get the bush back in place & its lock washer pushed tight up behind it.

The steering is all back rock solid & smooth again now.

Brake line guard

I've read somewhere, don't remember where, that some testing centres like the brake lines covered when they are routed along the underside of the chassis tube. I have no idea whether Gillingham will check this but it makes sense to give the lines some protection anyway:

I'm using a length of PVC pipe adjusted to fit around the lines with strategic trim to ensure nothing chafes:

This picture is unfortunately very dark, but the guard fits neatly against the chassis tube & steering column mount - discrete & neat - there is no way to snag the brake lines now:

Boot floor

The boot floor in place & carpet simply laid over the top for now:

There is one more carpet to fit around the back of the boot-space but that will wait until after IVA.

Pedal box cover final fit

Fitting the pedal box cover for the final time, 
The brake reservoir line is secured & trim added to make sure nothing chafes:

Pedal box & scuttle area is now complete, with the removable central panel installed & my home made VIN plate sitting on the offside (The VIN can be mounted anywhere obvious - chassis number must be front offside though):

Thursday, 14 March 2013

VIN Plate

When I picked up the kit, due to the distance involved, I decided to get the chassis number welded on & the VIN plate prepared - all well & good, except since May 2012 the IVA rules changed on VIN plates and got very specific about the information presented and the order it appears.

GBS have been working on a new design for some months, but its not quite going to be ready for my IVA. I had a chat with the testing centre at Gillingham and confirmed my original plate would not meet the current regulation & although possible to change it/mask out some information it wasn't going to ever look very good.

New IVA rules state Manufacturer, Chassis Number and weights to appear in a separate box and in the order: Manufacturer, Chassis Number, Gross Weights, Axle weights. If any further information is included it it must be outside a box containing the mandatory stuff - so even blanking out the boxes would leave me with a fail on the GBS logo & tag line.

This is my original plate - love the styling but its not compliant anymore: (also anyway its 2013 now)

VOSA advised making a new plate simply with the manufacturer name and chassis number. The weights are optional anyway so touch wood this design should be ok; Spent an hour or so this evening making a plate from an off-cut of aluminium. After this picture was taken I also added 'dots' either side of the GBS manufacturer name to meet the regulation that letters could not be added/removed:

Funny thing - it took me one practice run to get a good impression from the stamps; using the vice underneath worked much better than the wooden bench, then another 2 goes containing mistakes - kept missing letters out, doh!

Cut out with the dremel then file off the edges, dremel wire brush and polished the front face.


Its obviously not laser cut & silk screen printed etc, but I think it has its own home made charm !

(VIN Numbers blacked out for privacy)

Tuesday, 12 March 2013

Brake fluid reservoir

Its far too cold to be messing about in the garage, so just spent 5 minutes this evening connecting up the Brake Fluid reservoir sensor.

Three connectors - ground, normally open, normally closed - the GBS loom connects on the normally open circuit (either side terminals) and pushing the cap centre tests the circuit; lighting the dash warning light.


Ran the engine for a couple of minutes - it ran ok after a couple of minutes but certainly doesn't like tick-over when very cold.

Monday, 11 March 2013

Insurance & IVA strategy

Insurance

The insurance is all set, just bar the paperwork arriving through the post.

limited mileage 5k / year, and initially on the VIN plate which will let me drive her to IVA, and on to any garage to correct any issues found on the test.

I can progress to agreed value at some point but to be honest i'm unlikely to be able to insure the car for the build value - my plan is not to prang it :)

IVA strategy

My thinking is I had a couple of options re IVA:

1. Hire a trailer/truck to take the car & have it MOT'd before the IVA - cost of truck at least two ways to MOT, Rolling road & IVA.

-or-

2. Drive to the IVA, then I'll have either a pass or definite list of things to fix. Importantly I can then legally drive it to get the items remediated. Provided each fix has a pre arranged appointment etc.

There is a possibility IVA will not let me drive the car home due to it being unsafe. I hope this will not happen since I have a 10 mile drive to the testing station thus: if I make it to the station in one piece then touch wood there's not  much wrong with the car.

Of course its possible I don't make it to the station and lose my test fee...    

Got to take the chance though - if its meant to be then there'll be no problem.

Route

The route is about 9.5 Miles couple of speed-bumps to negotiate and an interesting hairpin up the hill at Boxley:
View Larger Map

-or-

Current preferred route through the middle of Maidstone & up Blue Bell hill & avoiding the M2:

View Larger Map

Snow in Kent today & 3.5 hours to get home from work @ 4-15mph for 30 miles including getting stuck & being pushed at one point; hope that clears up before next Thursday - my last experience with rear wheel drive and snow ended predictably in sliding sideways up a hill.

Saturday, 9 March 2013

Column cowl & more trim

A little work required to route the stalk loom through the original Sierra column cowl; it does all fit though, I added trim over the column mounting to ensure theres no chance of the loom chafing.

I should find out what those spare wires are for on the dash loom; I think (but not tested/checked) Pink is for a starter button, Orange the horn and brown a ground. They are all optional; just flexibility built into the loom depending where you need controls:

The opening on the nearside needed a little adjustment along the bottom edge to avoid fouling the stalk, probably because my cowl came from an different car to the stalks:

The return edge on the scuttle; I don't think its necessary for IVA to trim this since its behind the dash and diagonal chassis tube, however I didn't like that sharp edge:

I learned the hard way first time I tightened the positive battery terminal some months back, got a nice little blue spark as my spanner earthed on the scuttle leading edge. Granted the terminal is not connected/disconnected that often, but with 6" of trim its now foolproof: